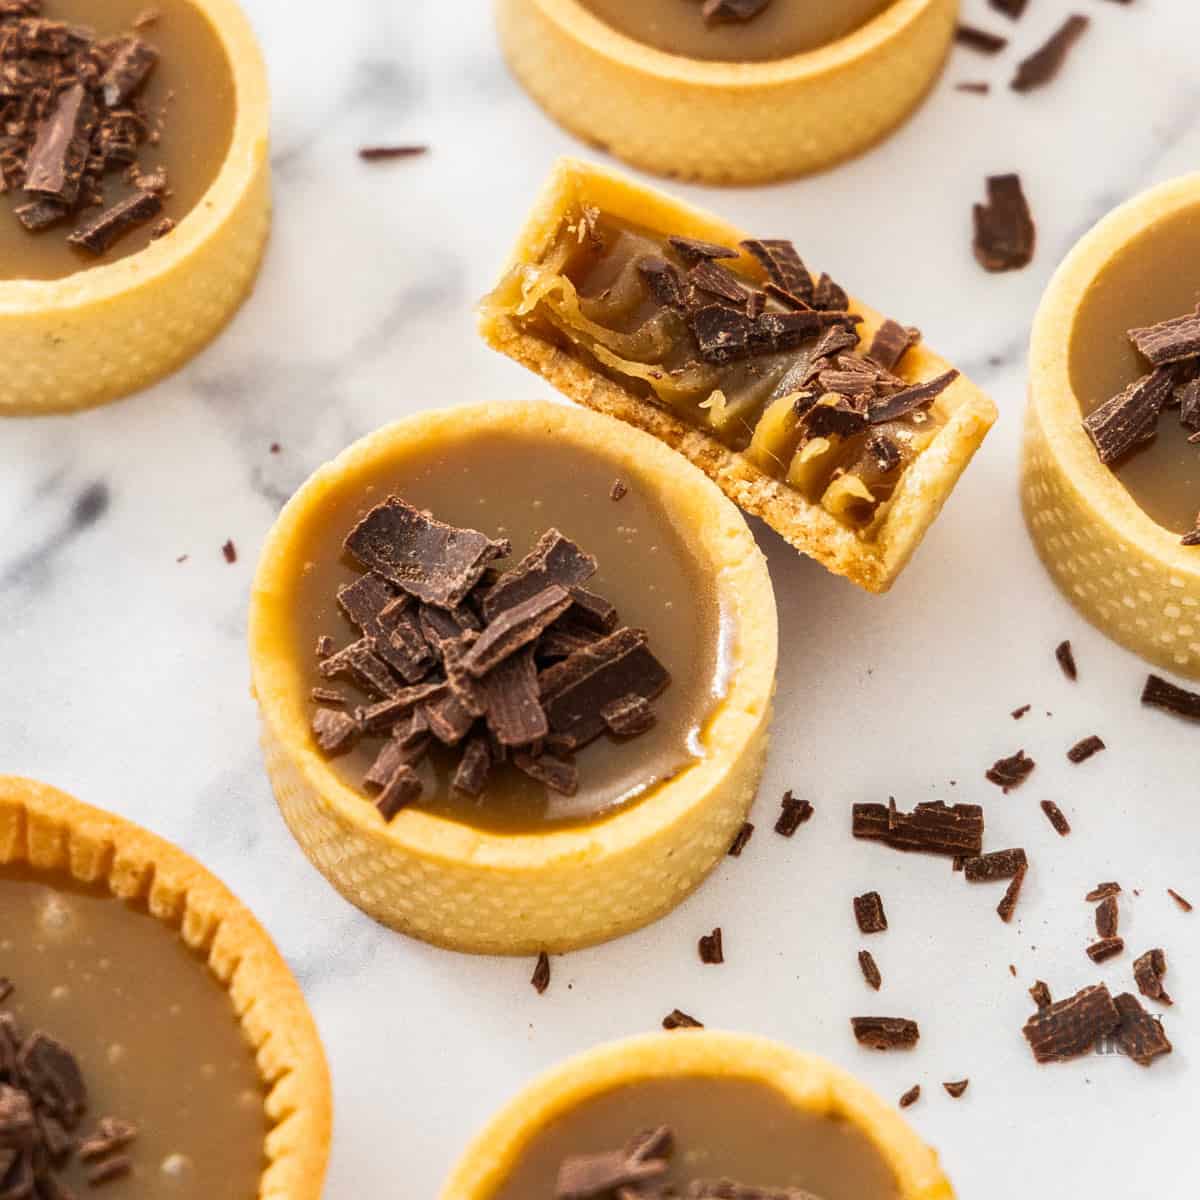
Butterscotch Tartlets
Butterscotch Tartlets with crisp, buttery pastry shells and a rich, silky butterscotch filling that sets beautifully. Perfect little treats.
Print
Pin
Servings: 32 tartlets
Calories: 143kcal
Equipment
- Food processor helpful but not essential
- Silicone "air" perforated baking mats helpful but not essential
- 24 5cm / 2 inch performated tart rings or 2x muffin pans
- Insulated baking tray or baking sheet
- Rolling Pin
- Rolling pin guides very helpful but not essential
- Medium heavy-based saucepan
For best results, weigh ingredients with a kitchen scale.
Ingredients
FOR THE MINI TART SHELLS
- 130 g unsalted butter cold and cubed (4 ½oz)
- 260 g pastry flour (or plain flour/all purpose flour) (2 cups)
- 30 g almond meal (almond flour) (¼ cup)
- 95 g icing sugar (powdered sugar) (¾ cup)
- ¼ teaspoon salt
- 45-50 g egg cold (this may be a large or medium egg depending on where you live)
FOR THE BUTTERSCOTCH SAUCE
- 200 g light brown sugar (1 cup/7oz)
- 32 g plain flour (all purpose flour) (¼ cup)
- 113 g unsalted butter room temp (4 oz)
- ½ cup thickened cream (heavy cream) room temp (125ml)
- 1 ½ teaspoons vanilla extract
- ¼ teaspoon salt
Instructions
- MAKE THE PATE SABLEE DOUGH: Weigh out the butter, cube it and leave it in the fridge right up until you use it.
- Add the flour, almond meal, icing sugar, salt and cold, cubed butter to a food processor (or see notes for other methods). Process on low, pausing every 10 seconds, to check, just until the butter and flour mixture looks like sand. There should be no big chunks of butter left but it should not be clumping.
- Add the egg and process on low until it starts forming large clumps and there is no flour visible.
- Turn the mixture out onto a clean work surface and pull it together with your hands then knead it, pushing the dough down and away from you then gathering it back up, just until it looks smooth. This should take no more than 30-60 seconds.
- For tart rings or small tart shells, cut the dough into 2 even pieces and roughly shape each one into a smooth rectangle shape. For larger tart shells, leave it as one piece.The butterscotch in this recipe only makes enough to fill 12-16 mini tart shells, so you can freeze half of the dough at this point if you like, or fully make and bake all the tart shells and freeze half of them at that point.
- Take a baking mat, silicone rolling mat or sheet of baking paper and dust very, very lightly with flour. Place one portion of dough on top, dust the top of that lightly and place another mat on top. Roll the dough out slightly, trying to keep a rectangular shape.
- Roll the dough out to 2mm / ¹⁄₁₆ inch thick (or 3mm for larger tarts). If using rolling guides, roll the dough to 1cm / ½ inch thick, then place a guide on each side of the dough.
- Lifting the mat or paper, place the dough onto a chopping board so that it lies flat. Repeat with the second portion of dough. If using tart rings, to get as many tart shells and the side pieces as possible from the first roll, roll one of the pieces a little more square to at least 25cm (10 inches) on one side.
- Place both in the fridge for a minimum of 2 hours or overnight (best).
- SHAPING THE DOUGH: - Keep the dough as cold as possible as you work. If you feel it getting too soft or sticky, return it to the fridge for 10 minutes.- For best results, make the dough the day before and chill in the fridge overnight.- Make some room in your freezer (enough to fit your muffin pans or a tray with the tart rings on it in a single layer - Line that tray with a baking mat or baking paper.)- At all times, you want the dough to be pliable yet firm. If it’s too soft, your tart shells won’t be as neat. If it's too firm, it may crack as you're trying to lift your pieces into your rings or pans.
- Take the square piece of rolled dough out of the fridge and peel back the top baking mat/sheet then place it back on. Flip it over and peel away the second one, setting it aside.
- TART RING STEPS:Using the tart rings, gently press down into the dough to cut out the bases, from one piece of rolled out dough. Transfer them to a baking tray lined with baking paper. If the circle of dough falls out, just gently insert it back in.
- Using a ruler to guide a straight line, a dinner knife, and the second sheet of dough, cut 32 strips just slightly taller than the sides of your tart rings and long enough to go all the way round the inside.For the 5cm perforated tart rings these strips are about 1 ½ x 15cm / ~½ x 6 inches.
- Moving quickly so the dough doesn’t soften too much, use an offset spatula to help you lift each strip and place them into the tart rings immediately. Making sure the strip is up against the inside of the tart ring all the way around, cut the overlapping dough off leaving just a tiny overlap and gently seal that seam with your fingers.
- Very gently run the tip of your finger around the bottom inside corner of each tart to help to get a seal between the sides and the base. You don’t need to press it together with any force. The dough should have softened just enough at this point that just running the tip of your finger around will help to push the seam together a little.
- MUFFIN PAN STEPS:Cut circles of dough using a cookie cutter slightly larger than the top of the muffin hole. Place the circle of dough on top of the muffin pan hole and lift one edge (this will allow air to escape). Gently press down to the base then into the corners of the muffin pan hole, then finally press the open edge neatly into place.
- Tart rings or muffin pan: Use a sharp knife to make little pricks in the base of each tart shell. Freeze the tart shells for a minimum of 30 minutes but 1-2 hours is better. You can also just chill in the fridge overnight.
- BAKING THE TART SHELLS:You can add fillings now that require baking, or you can par-bake the shells or you can fully bake them. Below are the details for fully baking them.Preheat the oven to 180°C / 350°F (not fan forced).
- Tart rings or muffin pan: Using an insulated baking tray (best) or using a regular baking sheet stacked onto a second, line it with a silicone baking mat (mesh is best but regular is fine, baking paper is the third best option but will still be fine).
- Place the tart rings or muffin pan onto the lined baking sheet. If you missed it, make sure to prick the bases a few times with a knife tip.
- Tart rings: Bake for 17-18 minutes, until golden brown, rotating the baking sheet halfway through.Muffin pan: Bake for 12-22 minutes until golden brown inside, removing the cupcake liners (if using) in the last 3-4 minutes. Baking time depends heavily on your tray/baking mat configuration. Quicker baking is not necessarily a better result- Muffin pan alone, no cupcake liners - 12 minutes- Muffin pan alone, with cupcake liners - 14-15 minutes- Muffin pan on a baking sheet, no cupcake liners - 15-16 minutes.- Muffin pan on baking sheet with silicone baking mat and with cupcake liners - 22 minutesOnce you notice them turning golden, very carefully remove the cupcake cases by lifting them from side to side until they let go of the base, then bake until the bases look dry.
- Let them cool on the baking sheet. They will be slightly soft after you take them out of the oven and will crisp and firm up as they cool. Remove the tart rings, or gently twist to remove them from the muffin pans, once cool.
- FOR THE BUTTERSCOTCH:Add the sugar and flour to the saucepan and whisk to combine, then add the butter and place over low to medium heat. Stir until the butter melts then use a whisk, stirring vigorously until the mixture is fully incorporated.
- Whisk in the cream, and stir to dissolve the sugar fully before letting it come toa bubble.
- Let it boil away, whisking regularly, for 4-5 minutes until it thickens and reaches 120C/250F on an instant read thermometer.
- Remove the butterscotch from the heat and stir in the salt and vanilla.
- Let the butterscotch cool for 10 minutes, then pour it into your tartlet shells.
- Chill for 2-3 hours until fully chilled and set.
- Please take a moment to leave a comment & rating. It's appreciated and so helpful.
Notes
- Yield: This recipe makes enough pâte sablée for 32 tartlet shells using a regular muffin pan or 5cm/2inch tart rings. The butterscotch will only fill 12-16 shells depending on how full you fill them. The other half of the tartlet shells or the dough before making them can be frozen.
- Methods for making the dough:
- Food processor: I always get the best results with this dough using a food processor and it just happens to be the easiest method.
- Stand mixer: You can use a stand mixer, making sure the butter is cold first blending the butter into the flour then mixing in the egg. This way can take 10 minutes just to get the butter to blend into the flour.
- By hand: You can use your hands - cold butter is great but it can be tough on your fingers. Slightly softened butter works just as well using the hand method. Just use your fingertips to blend the butter into the dough. Try not to melt the butter and use light hands. Then mix in the egg by hand. This method tends to be quicker than using a stand mixer but messier than a food processor.

Love the recipe?Add The Buttery Crust to your Google Preferred Sources!
Nutrition
Calories: 143kcal | Carbohydrates: 16g | Protein: 1g | Fat: 8g | Saturated Fat: 5g | Polyunsaturated Fat: 0.4g | Monounsaturated Fat: 2g | Trans Fat: 0.2g | Cholesterol: 26mg | Sodium: 42mg | Potassium: 26mg | Fiber: 0.3g | Sugar: 9g | Vitamin A: 252IU | Vitamin C: 0.02mg | Calcium: 14mg | Iron: 1mg
