
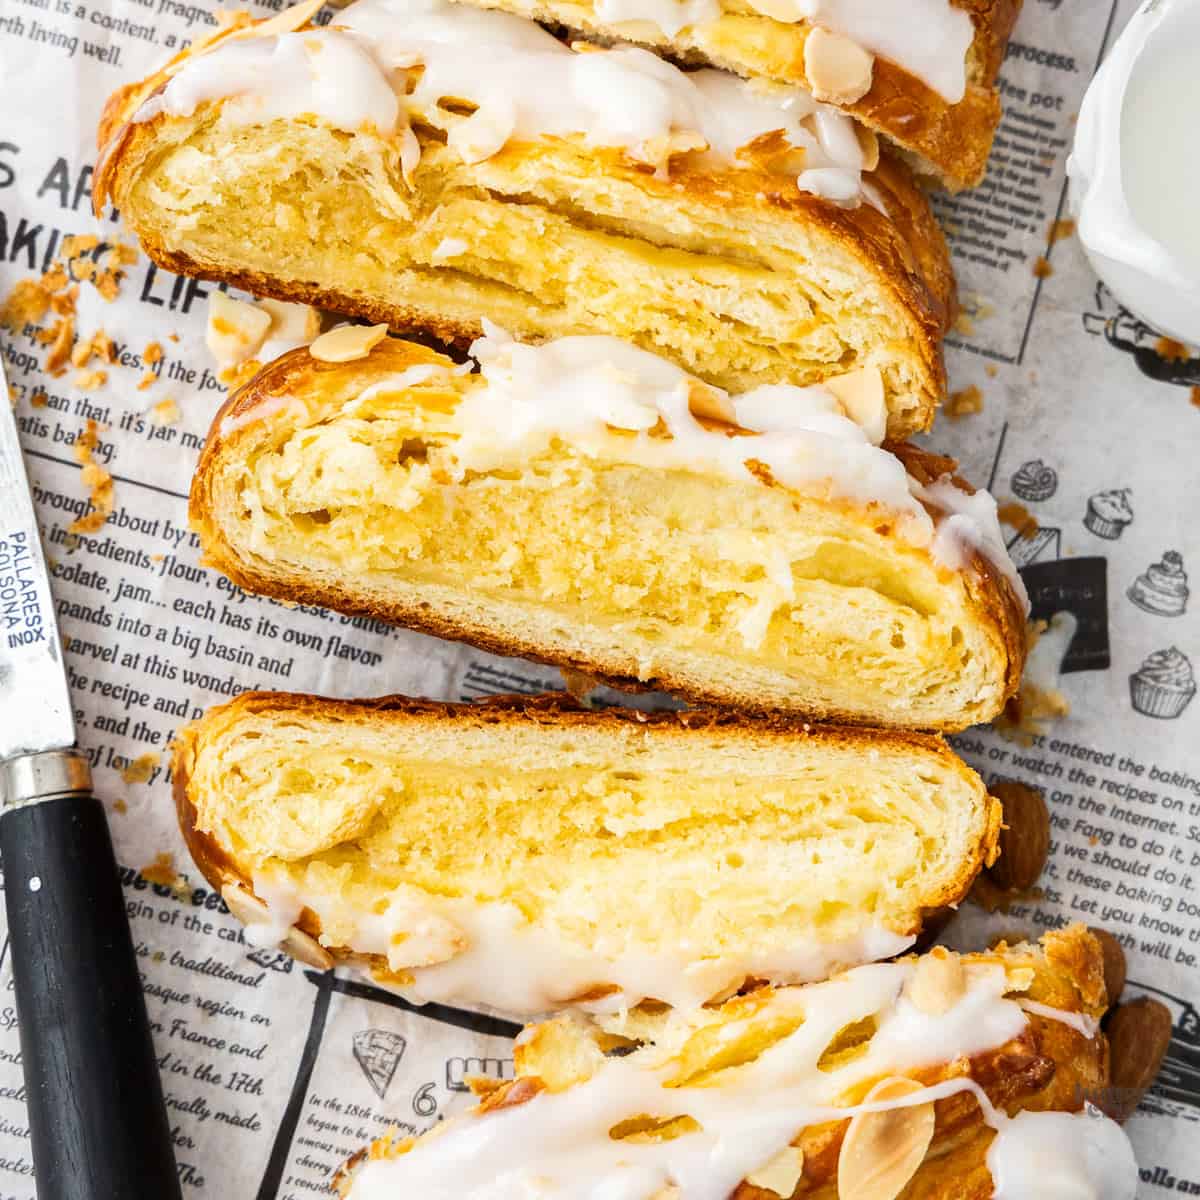
With a flaky, layered Danish pastry encasing soft almond filling, this almond Danish braid is nutty, buttery and deliciously addictive. It's a showstopper and a perfect way to start a special morning - everyone will be craving seconds.
And that gorgeous braid is the only difference between this showstopping almond pastry and an almond kringle / Danish kringle (most often made in a doughnut shape).
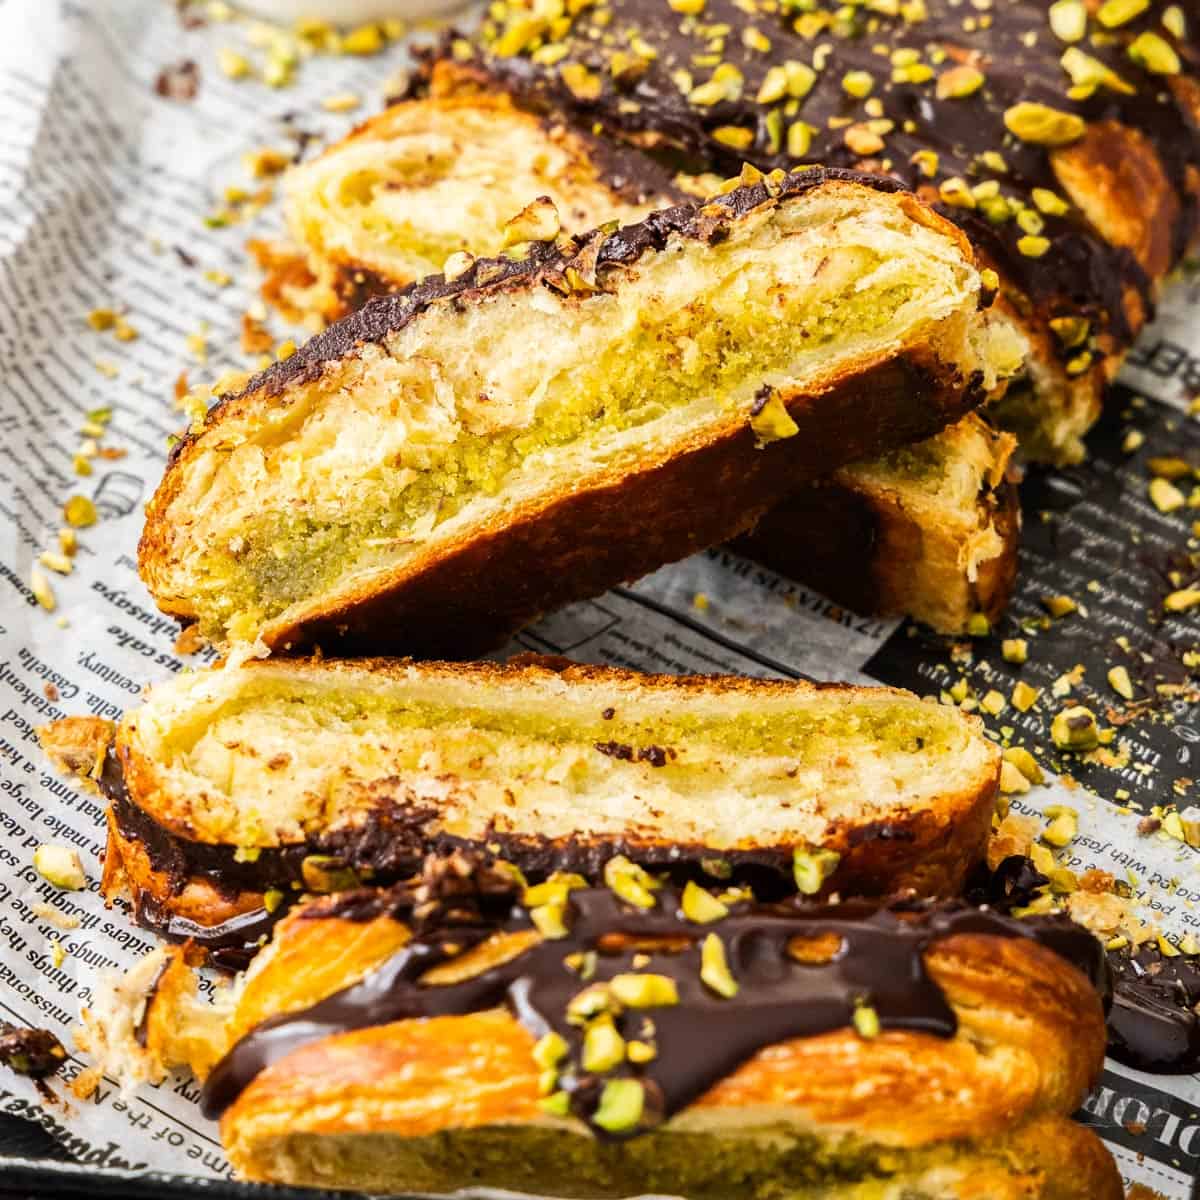
Try this chocolate and pistachio Danish too!

Jump to:
❤️ Why you'll love it
- Simple ingredients turned into a beautiful Danish pastry
- Using my easy Danish dough for a classic Danish texture and flavour
- Rich, buttery and nutty almond flavour
- Perfect for breakfast, brunch or entertaining
- Freezer-friendly so you can get ahead
Never Miss a Recipe!
Get the latest recipes straight to your inbox!
Ingredients & substitutions
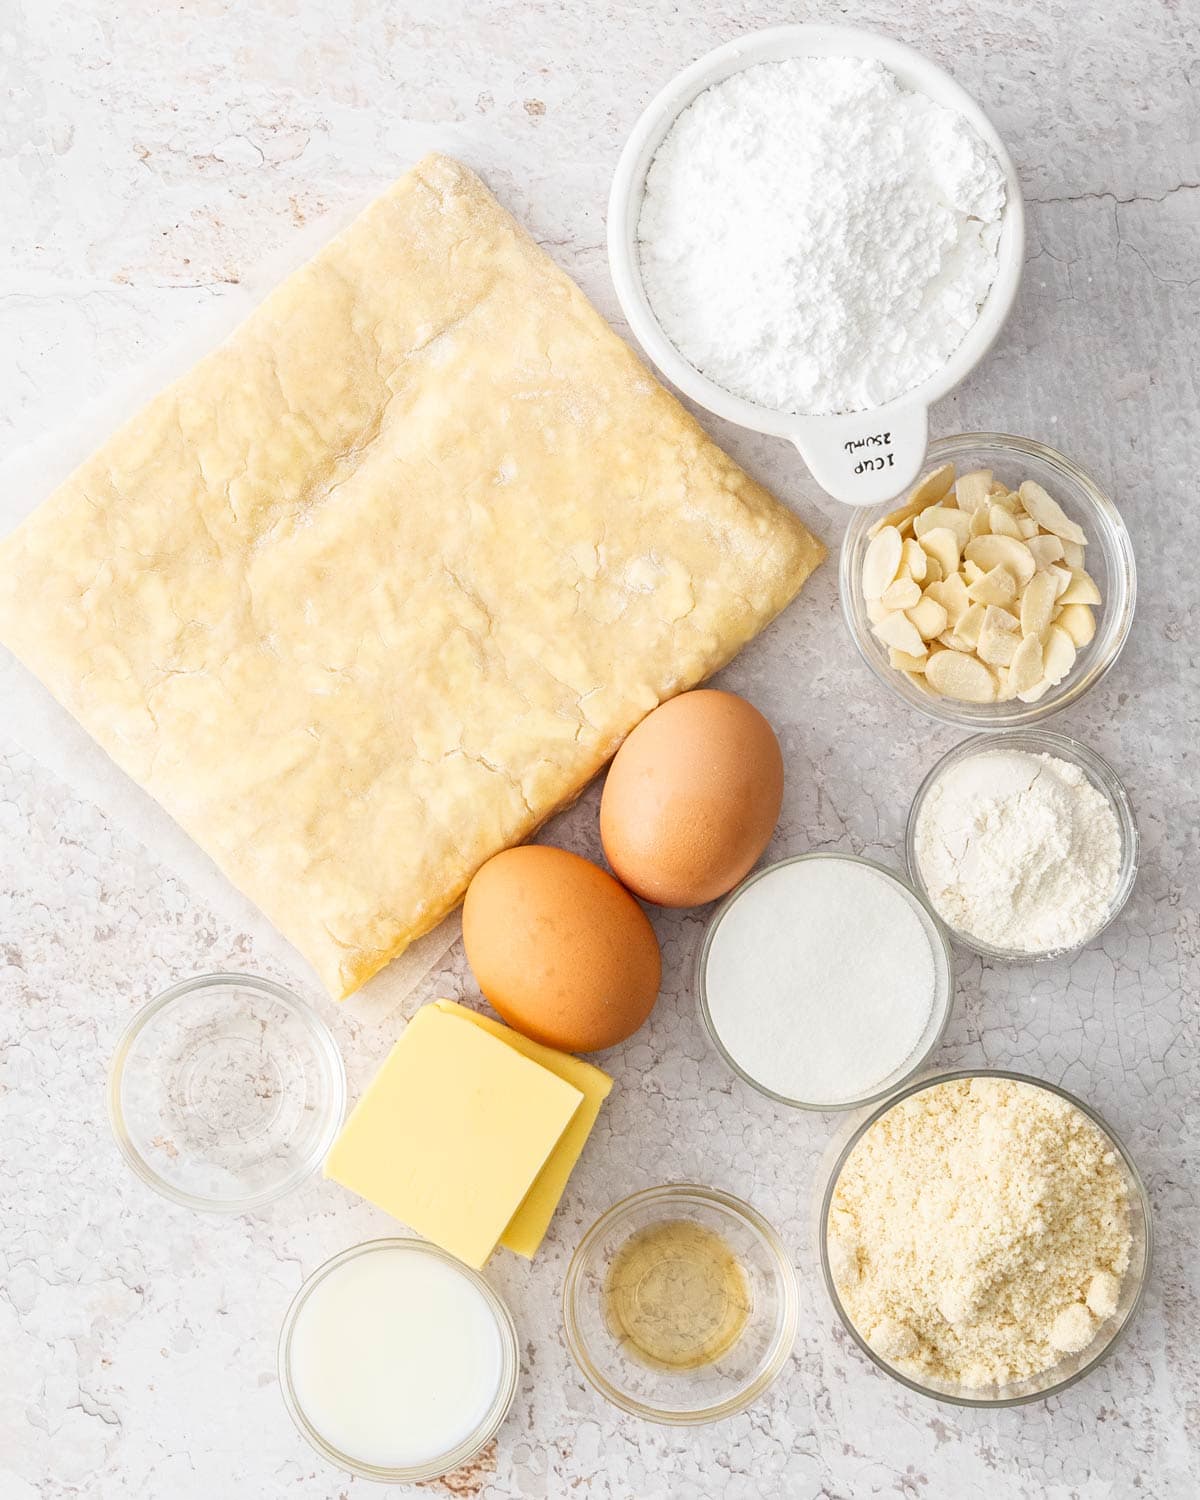
Jump to the recipe card for full quantities and instructions.
- Danish pastry: This almond Danish pastry is made using my easy Danish pastry recipe. If you want to save time, you can make it use a rectangular sheet of puff pastry though the texture will differ significantly. Danish pastry is more like a croissant texture-wise while puff pastry is more above crispy layers throughout.
- Almond cream / frangipane: The almond frangipane filling is made up of almond meal/almond flour/ground almonds, eggs, sugar, butter and almond extract. There is a little flour in there too for structure.
- Almond glaze: This 3 ingredient almond glaze is delectable and you only need icing sugar (powdered sugar), almond extract and milk.
How to make almond Danish pastry
Once you have your pastry ready (which is really easy to make in advance and even freeze for later), this almond Danish braid takes no time to pull together. It can even be made ahead and frozen so that you can put it straight into the oven later!
Jump to the recipe card for full quantities and instructions.
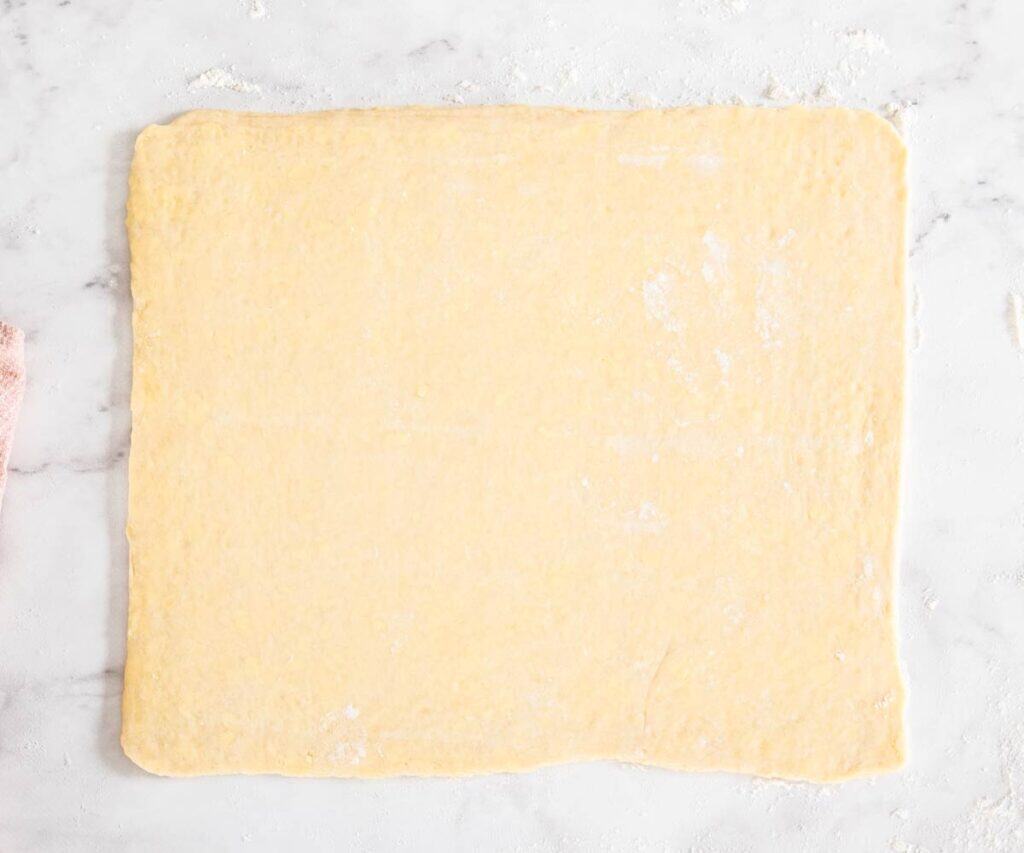
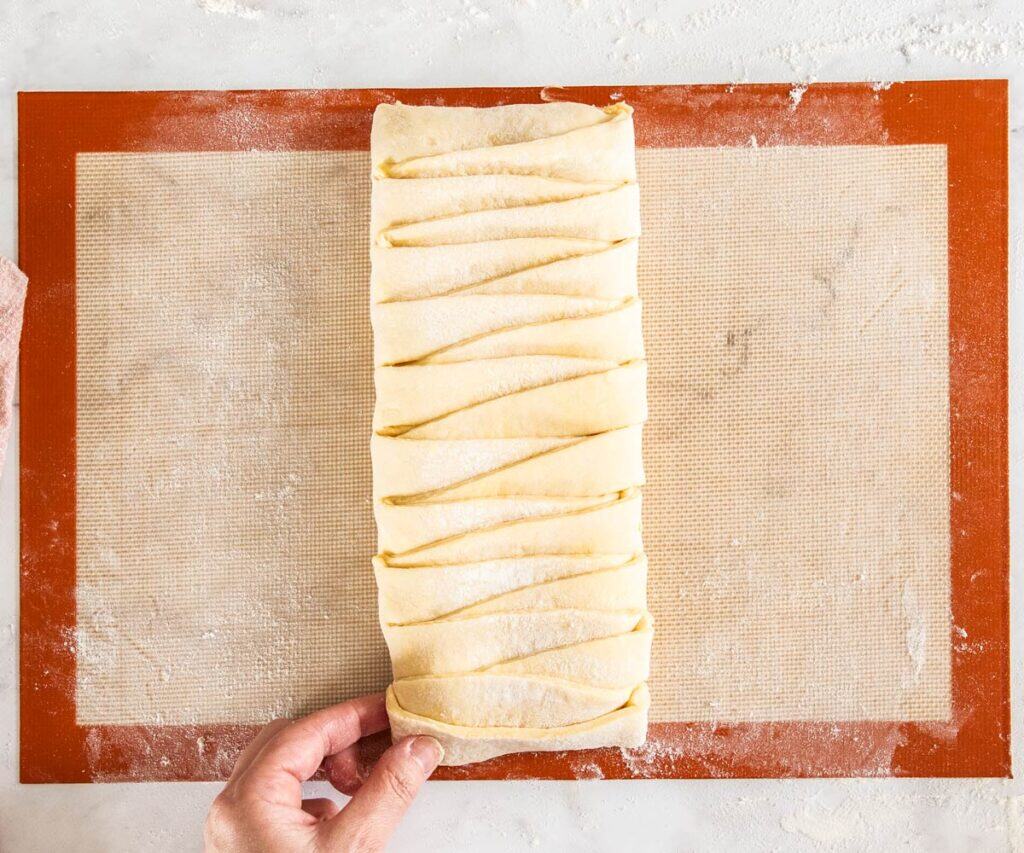
Roll the dough.
Roll the dough out into a large rectangle. For simplicity, you can use a sheet of puff pastry but keep in mind the texture will be different.
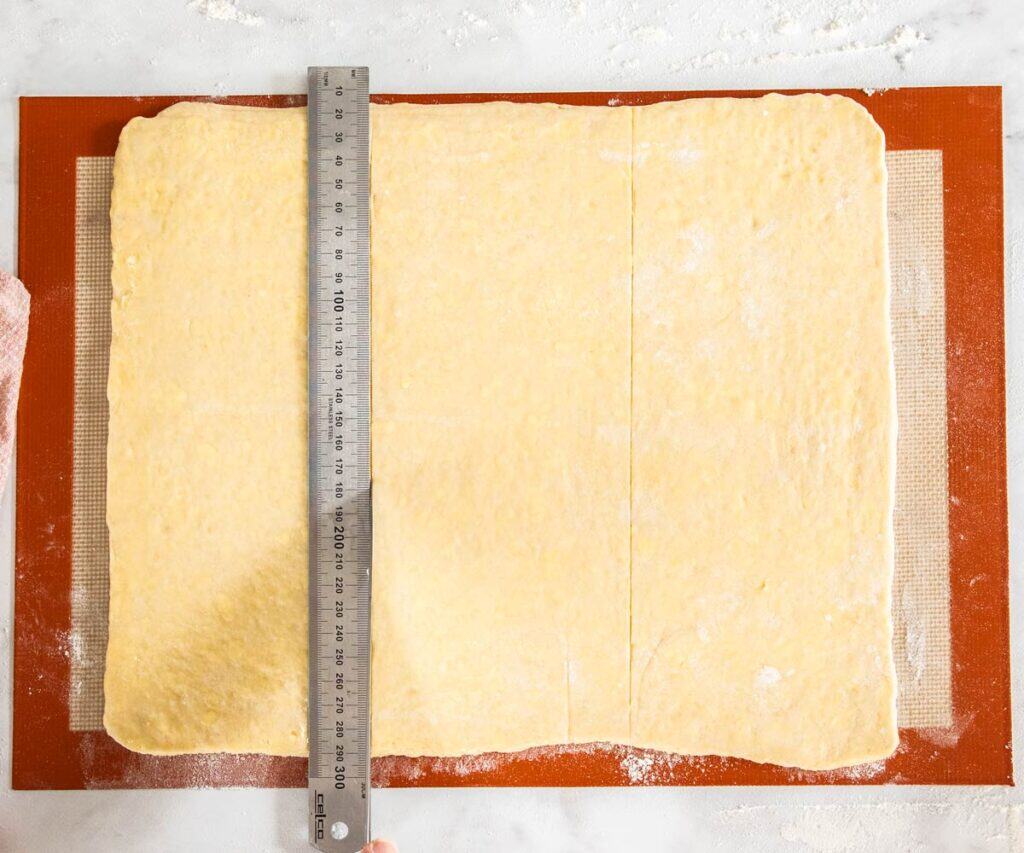
Score the dough
Lightly score the dough into three sections (don't cut through - this is just a visual guide).
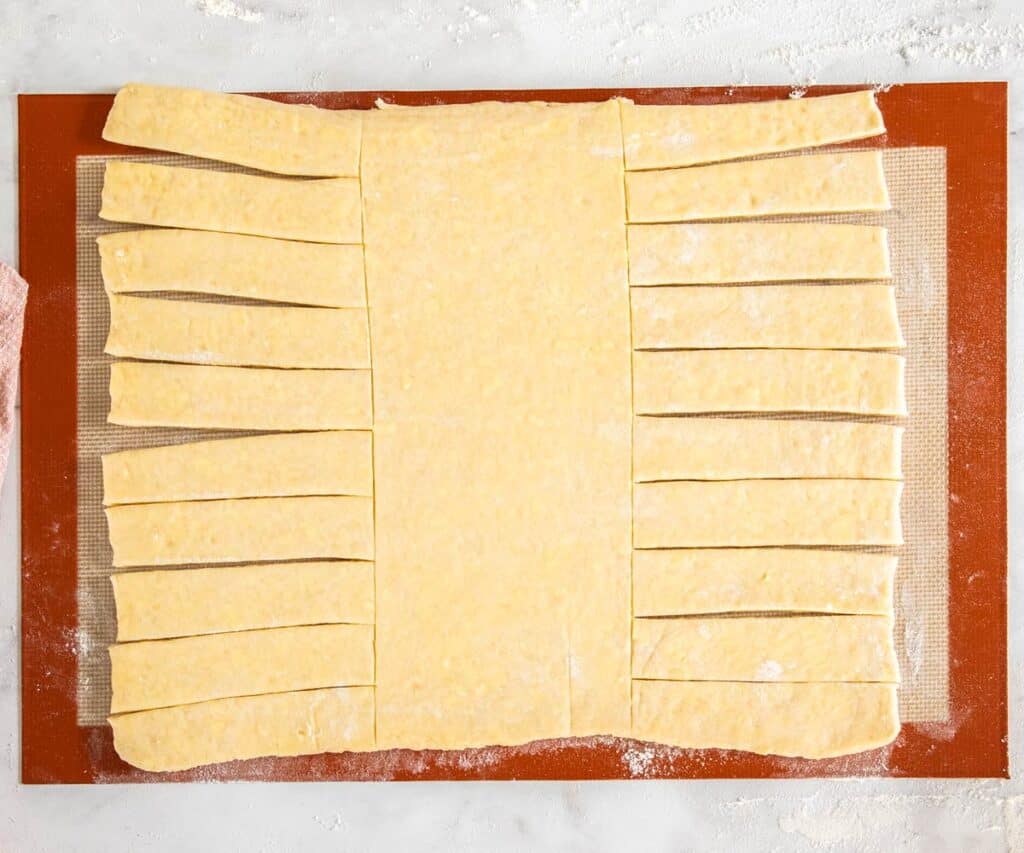
Cut the strips
On the left and right sections, cut the dough into 1 inch thick horozontal strips.
Make the almond filling
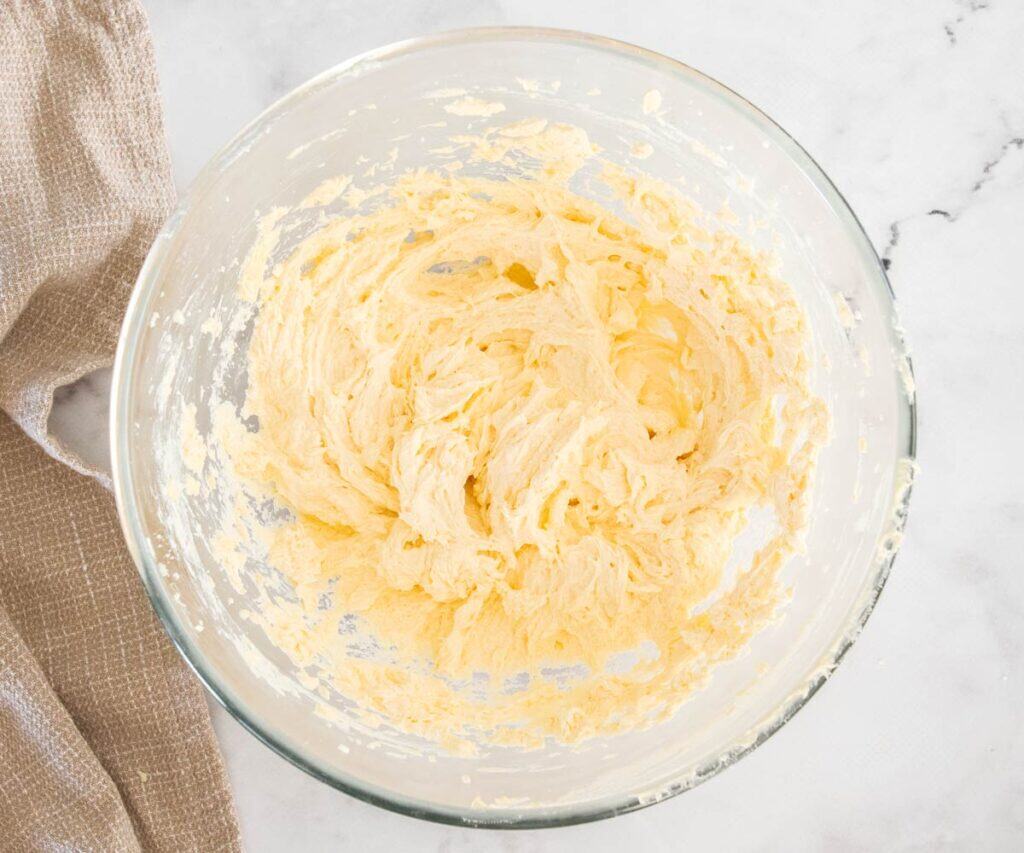
Beat together butter and sugar until light and creamy then beat the eggs in 1 at a time.
Add the dry ingredients
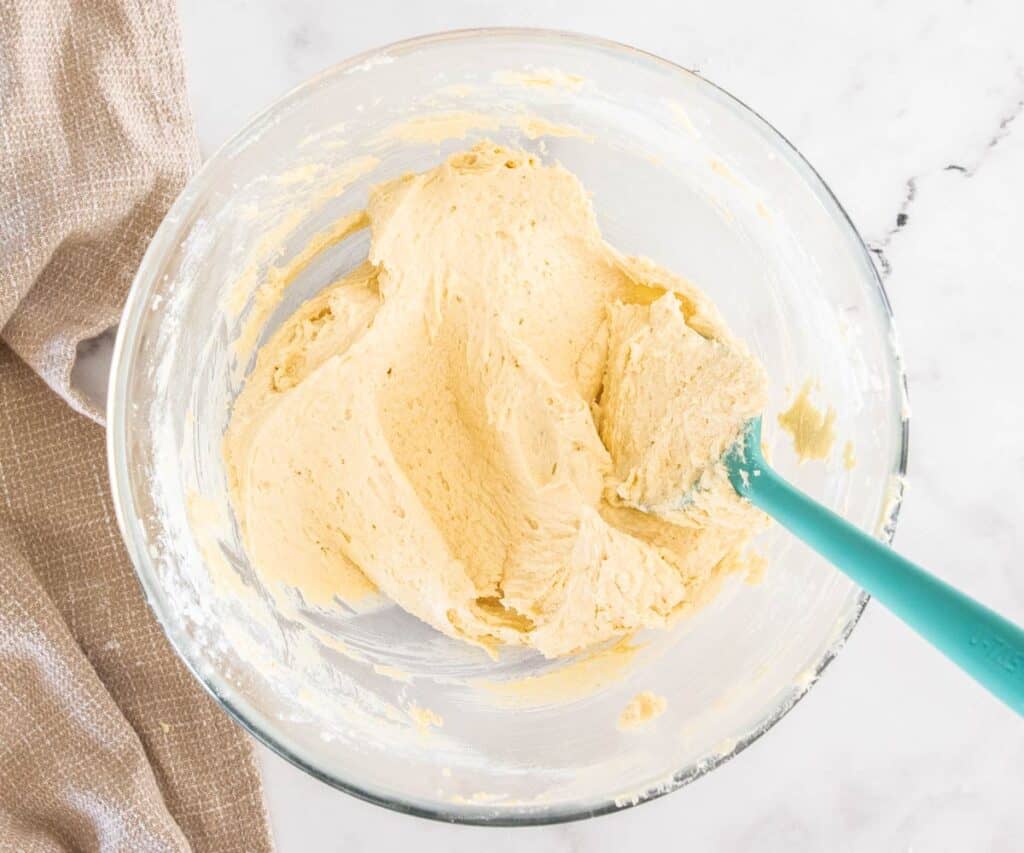
Now, stir in the almond meal and flour.
Save this post!
No spam, I promise 😊
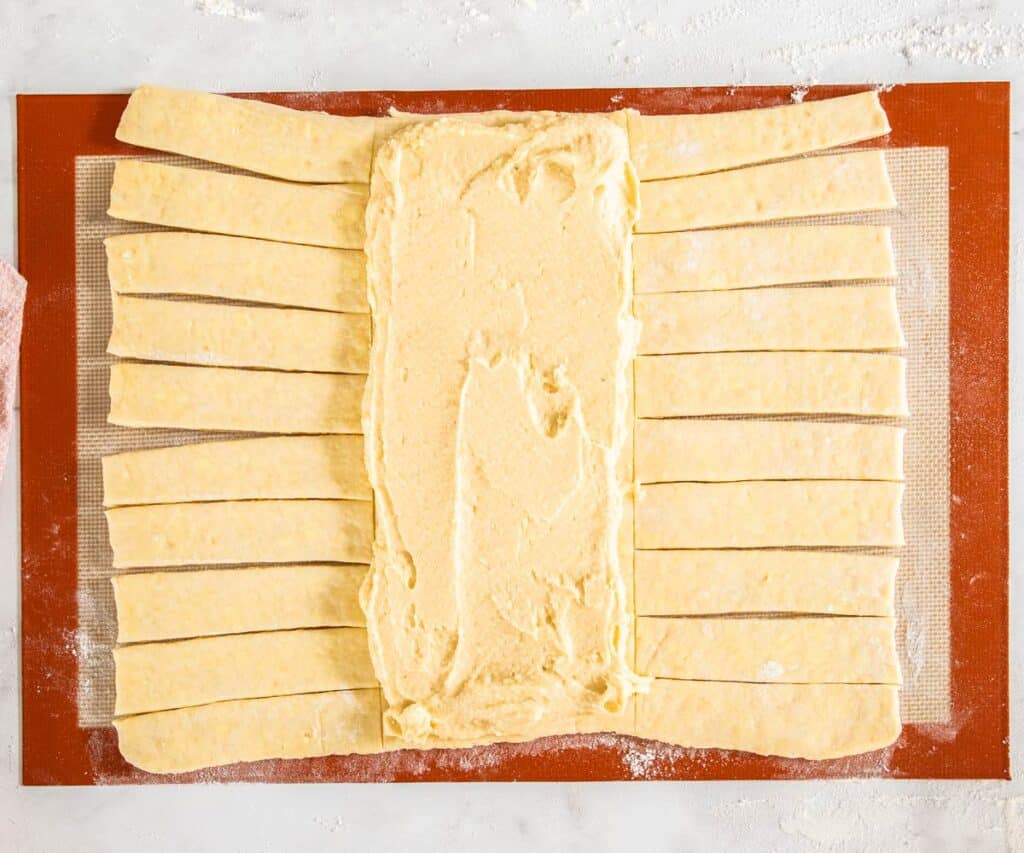
Add the almond fililng
Spread the almond frangipane filling over the middle section of pastry.
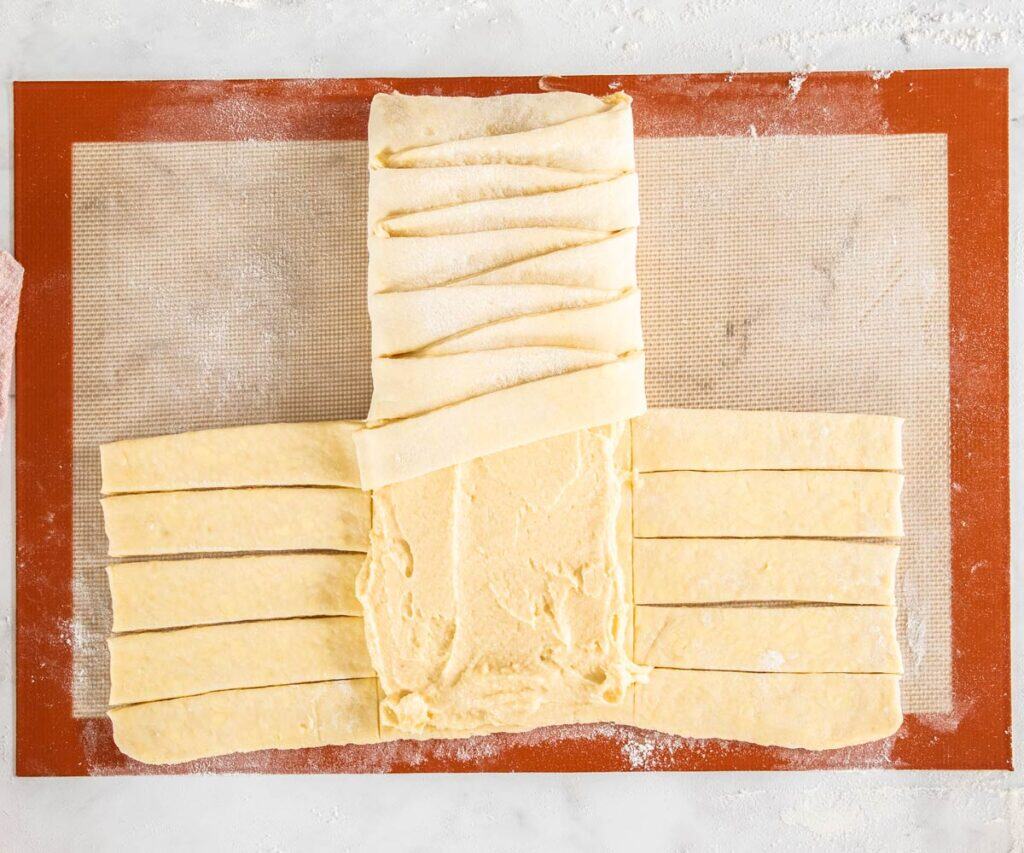
Start braiding
Braiding the dough is really just criss-crossing it. Fold one of the top side strips around the top edge of filling, then fold the top strip from the other side over so that it overlaps slightly. Start with the next strip on the opposite side and always press the strip down against the base of the next strip on the opposite side.
Rise
When you get to the bottom, fold the last strip so that it's holding the filling in at the base and tuck the end under the pastry. Let this rise in a warm spot for 30-45 minutes until it's looking puffy (it won't double in size).
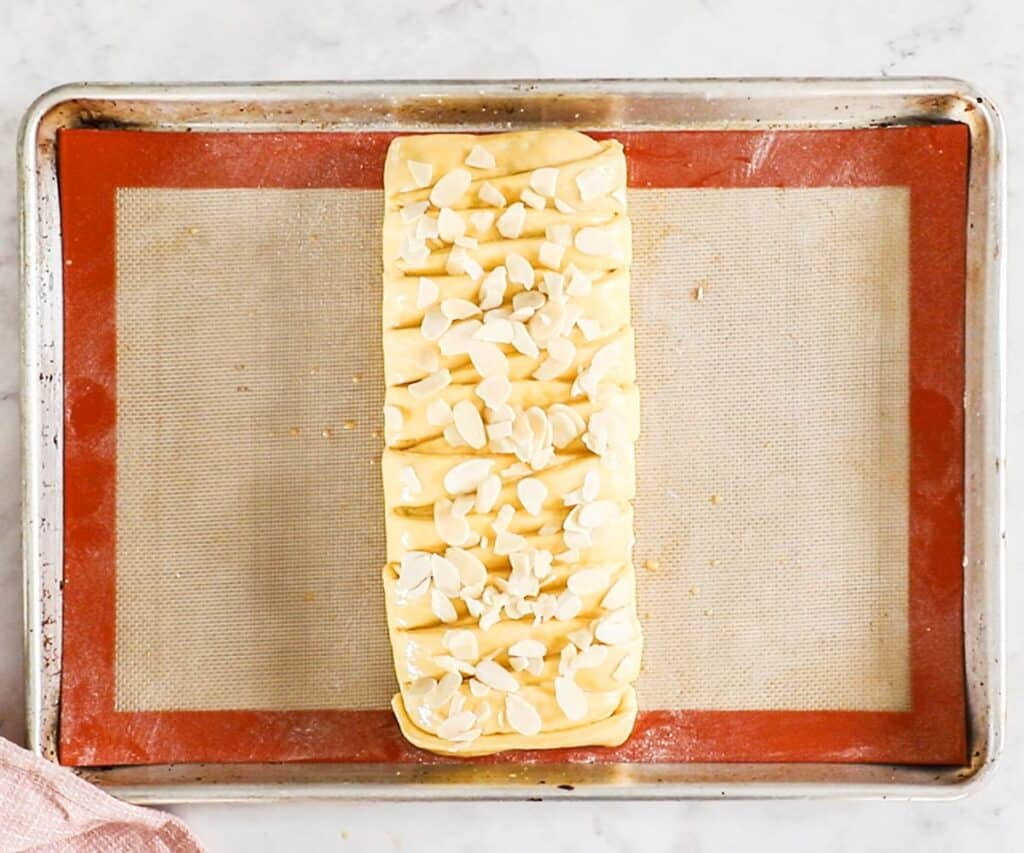
Egg wash and bake
Brush egg wash over the Danish braid, then scatter sliced almonds over the top.

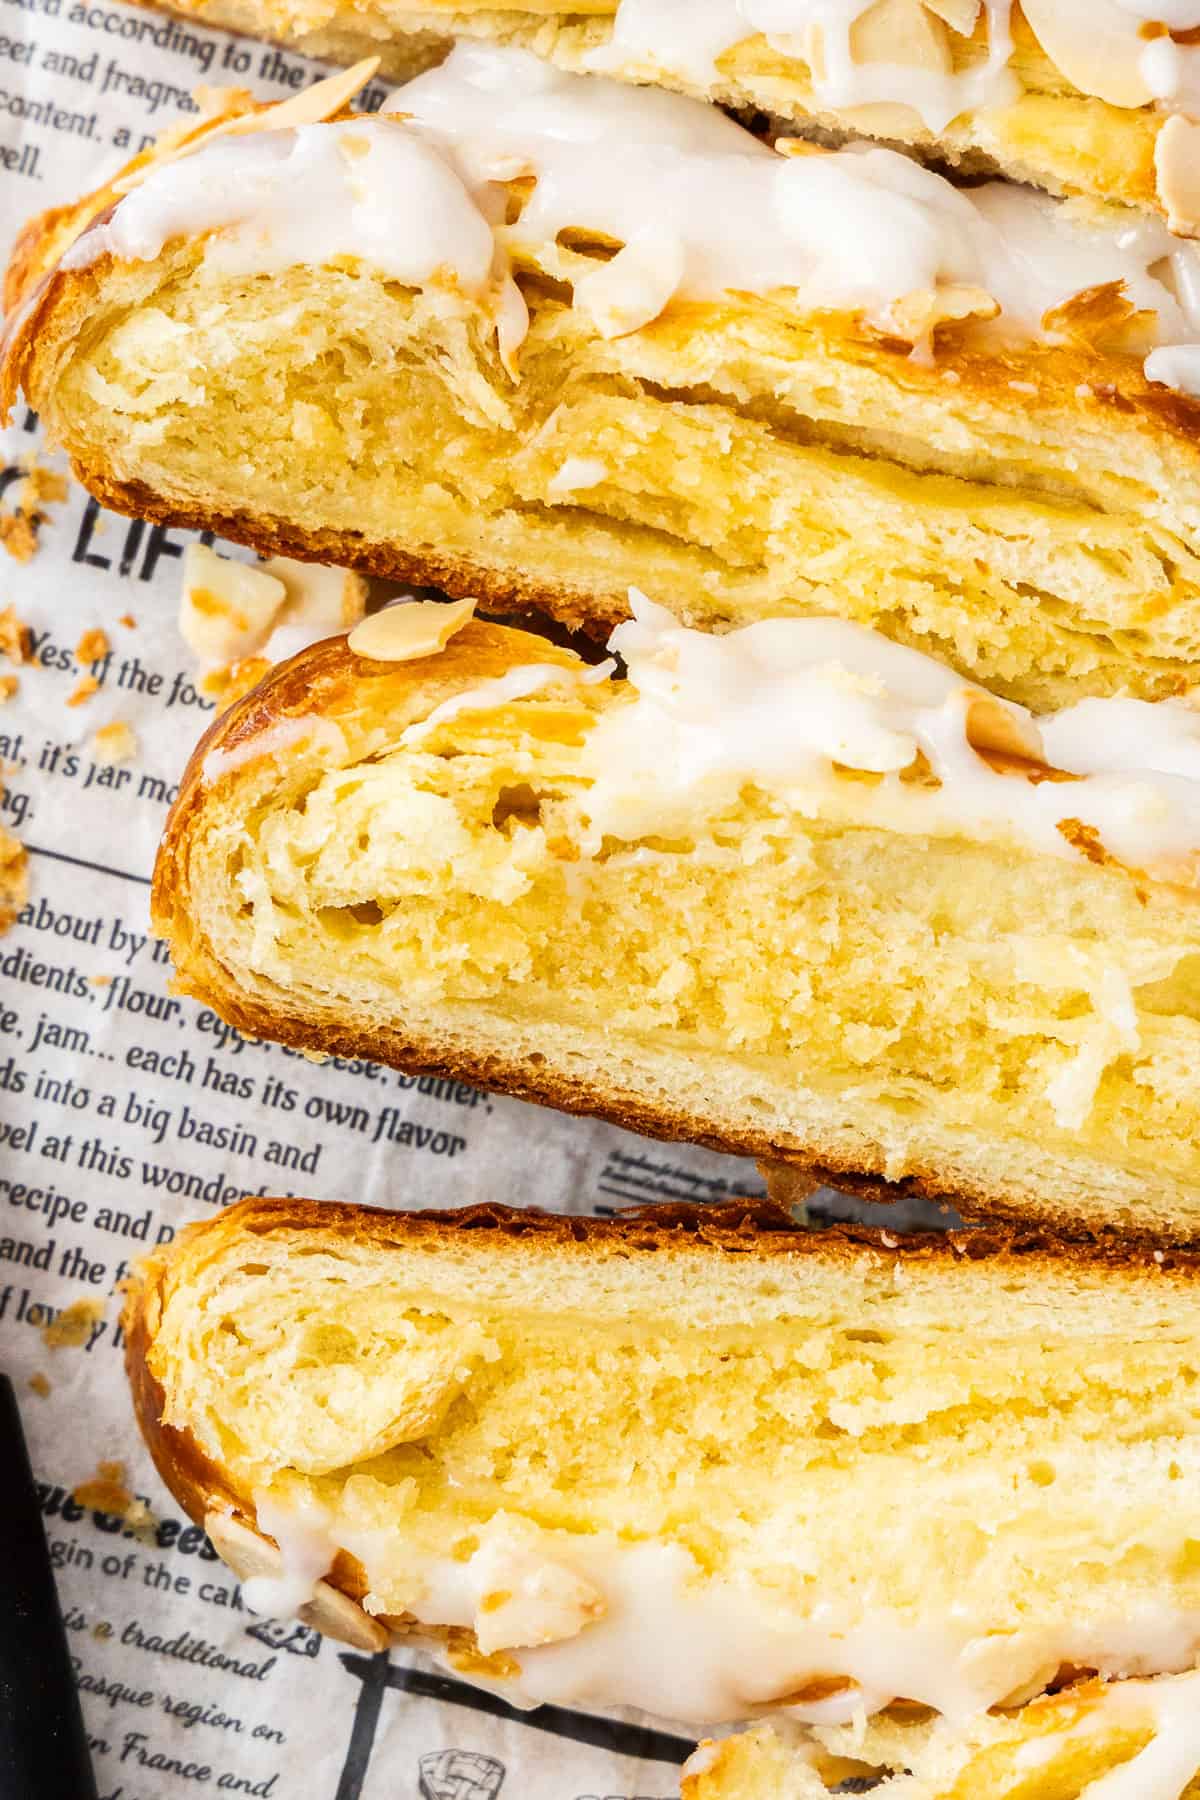
Make the glaze
Once the braid has cooled a little, mix together the glaze ingredients.

Ice the braid
Drizzle the almond glaze over the baked Danish. You can eat it immediatley or let the icing set first.
Tips and tricks
- Make sure the strips of the braid overlap slightly to hold that filling in as it bakes. If there are any holes the filling might try to seep out.
- Press the end of each strip down to the base of the next strip on the opposite side.
- If you find the filling has pushed out of the braid as it bakes, you can just take a dinner knife and gently push it back into the hole it came out of.
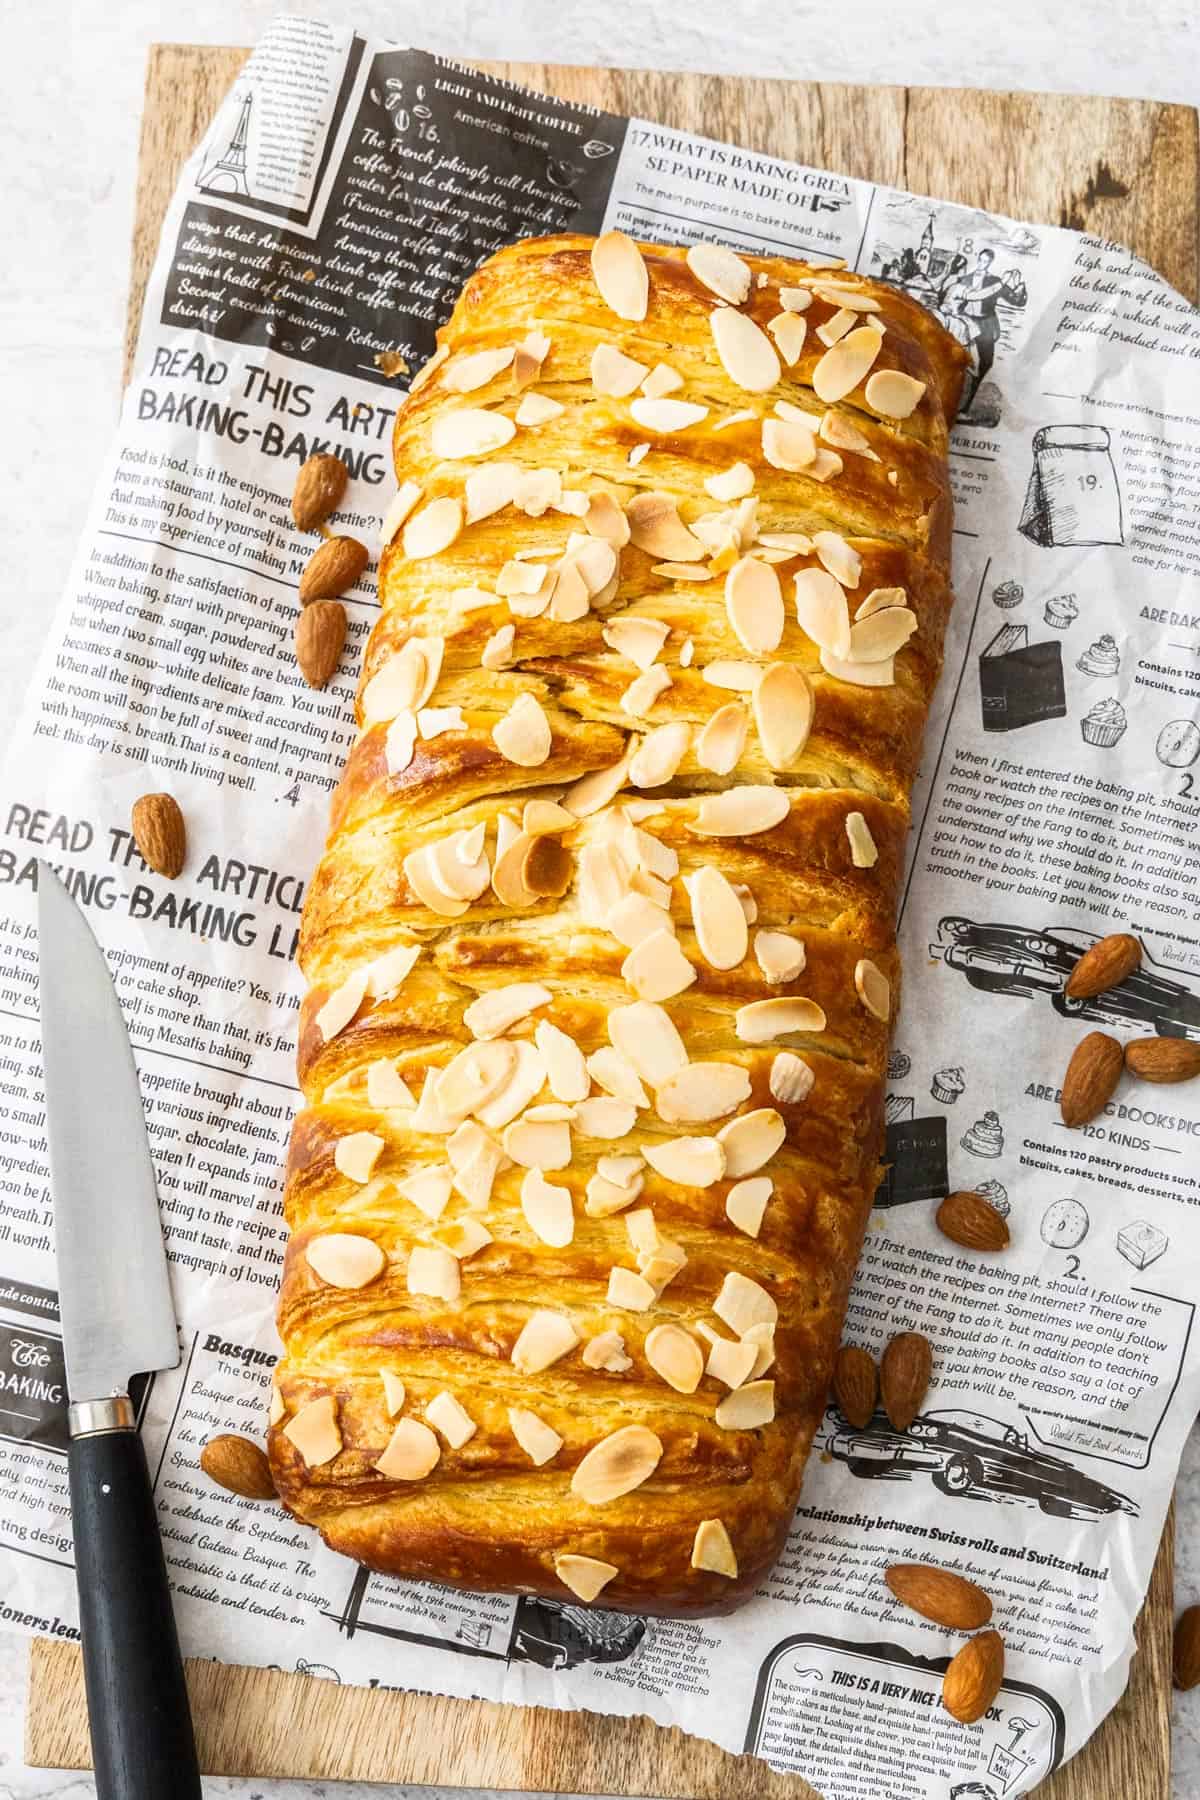
- If you notice the braid split down the centre during baking, don't worry. This can happen if using the easy Danish pastry as the dough layers are thin and the butter is in chunks throughout. Sometimes it happens and sometimes it doesn't. You can see the crack in this one below - that was wider when it came out of the oven but all you need to do is put something quite heavy and square on each side as soon as it comes out of the oven and gently push them inwards to push the crack together. As it cools, it will set in place. I used two square bottles of olive oil.
Variations
- Citrus: You can add a little lemon or orange zest to the almond frangipane filling for a little citrus tang.
- Other nuts: You can make your frangipane with other nuts like pistachios, walnuts or hazelnuts for a different flavour.
- Chocolate: Add some chocolate chips inside or a chocolate glaze on top for extra decadence (though this will mute the almond flavour a little).
- Jam: Try adding a layer of strawberry jam (or any flavour you like) under the frangipane filling.
Storage
- Leftovers should be stored in the fridge for up to 4 days. To serve again, just give it a little 10-20 second zap in the microwave to restore its fluffiness. You can also freeze it for up to 3 months. Let it thaw in the firdge overnight or at room temperature and give it a 10-20 second zap in the microwave to fluff it up again.
- Unbaked but assembled, you can store the almond Danish braid in the fridge overnight (skip the room temperature proof) or you can freeze it after the room temperature proof. It can be baked from frozen just add an extra 4-5 minutes.
More recipes you'll love


If you made this almond Danish braid recipe,
be sure to leave a ⭐⭐⭐⭐⭐ rating below. Thank you!
Hungry for more?
- Subscribe to Email, Facebook, Pinterest and Instagram.
- Add TBC to your Google Preferred Sources.
Almond Danish Braid
Equipment
- Mixing bowls
Ingredients
- ½ batch Danish pastry (notes 2)
- 2 tablespoons sliced almonds to top
- 1 large egg yolk mixed with 1 tablespoon milk or water (the egg wash)
ALMOND FILLING
- 50 g unsalted butter softened
- ¼ white granulated sugar (50g / 1 ¾oz)
- 1 large egg
- 50 g almond meal (almond flour / ground almonds)
- 15 g plain flour (all-purpose flour) (½oz / 4 ½ teaspoons)
- ¼ teaspoon vanilla extract optional
ALMOND GLAZE
- 1 cup icing sugar (powdered sugar) (130g / 4 ½oz)
- 6-8 teaspoons milk
- ¼ teaspoon almond extract
Instructions
- START THE DANISH DOUGH 1-3 DAYS PRIOR or see notes #2.
- FOR THE ALMOND FILLING: In the bowl of a stand mixer with paddle attachment or large bowl using a hand mixer on medium speed, beat the butter and sugar until light and creamy.
- One at a time, add the eggs beating on low each time until each one is fully incorporated. Add the almond extract with the last egg.
- Fold in the ground pistachios and plain flour with a spatula.
- ROLL OUT THE DOUGH: You only need half a batch of the Danish dough recipe for this so cut the dough into 2 squares, wrap one well and freeze it for another time.
- Roll one square of dough out into a rectangle about 32.5x27.5cm (13×11 inches) keeping the sides as straight as possible. You want it to be about 4mm/⅙ inch thick - no thicker. Trim if you need. Transfer to a sheet of baking paper or silicone baking mat.
- SHAPE THE DANISH (see detailed process shots in the post above): With the longest side closest to you, measure or eyeball 11cm (4 ½ inches) in from each side and score a line down towards you, don't cut through, just score so you can see three sections easily. So, with the longest side toward you, you should see a left side, a middle section and a right section.
- On the left and right sections using a sharp knife or pizza cutter, cut 1 inch thick strips, starting from the scored line next to the middle section all the way in a horizontal line to the edges. You should end up with 10 or so strips (1 more or less is fine).
- Spread the almond filling over the central portion of dough.
- Take the top right strip and pull it around the topping at the top edge so that it lies over it but is also holding it in at the top. Now take the top left strip and pull that over the top so that it just overlaps the edge of the first strip - press it down against the base of the next strip on the opposite side. Now, continue taking one from the right, then from the left, each time laying the strip over the filling and pressing it down at the base of the next strip.
- When you get to the last one, fold it straight around the bottom section of filling and tuck the end underneath the Danish braid on the other side to hold it in place.
- Using the paper or silicone mat, lift the Danish onto a large baking sheet. Sit at room temperature, covered with a tea towel for 45 minutes.
- Meanwhile, preheat the oven to 180C (160C fan forced) / 350F.
- After the 45 minutes, use the paper or baking mat to lift the braid and place it on a plate or just some firm but flat in the freezer for 15 minutes (this will help it hold it's shape better when you bake it).
- BAKE THE DANISH: Brush the egg wash over the Danish braid. Scatter the sliced almonds over the top.
- Bake for 25-30 minutes until golden brown and the pastry is cooked through. Let it cool slightly or completely before glazing.
- If you don't get perfect overlaps on the braid, you might find some of the filling pushes out as it bakes. You can just use a knife to push it back in as much as possible. Every so often the top might crack and cause the Danish to spread out in one spot (this is just because this is a cheats Danish pastry and the butter that's close to the surface might crack the thin dough as it melts and creates steam inside. If this happens, once you take the Danish braid out, whilst still hot, push something (preferably with a square edge like a square bottle) up against each side as it cools to push the centre back together. The almond Danish in these photos did exactly that and it still turned out beautiful.
- FOR THE ALMOND GLAZE: Sift the icing sugar into a small bowl.
- Add the milk and extract and mix vigorously to combine.
- Drizzle the glaze over the Danish and serve.
- Please take a moment to leave a comment & rating. It's appreciated and so helpful.
Notes
- Tablespoons: I use a standard Australian 20ml tablespoon (equal to 4 teaspoons). Check yours before measuring.
- Danish pastry: If you don't feel like making it from scratch, you can use 1 sheet of puff pastry in it's place. The texture will be a little different but it will still be lovely and quick.


Comments
No Comments