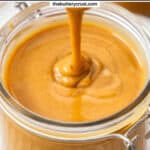
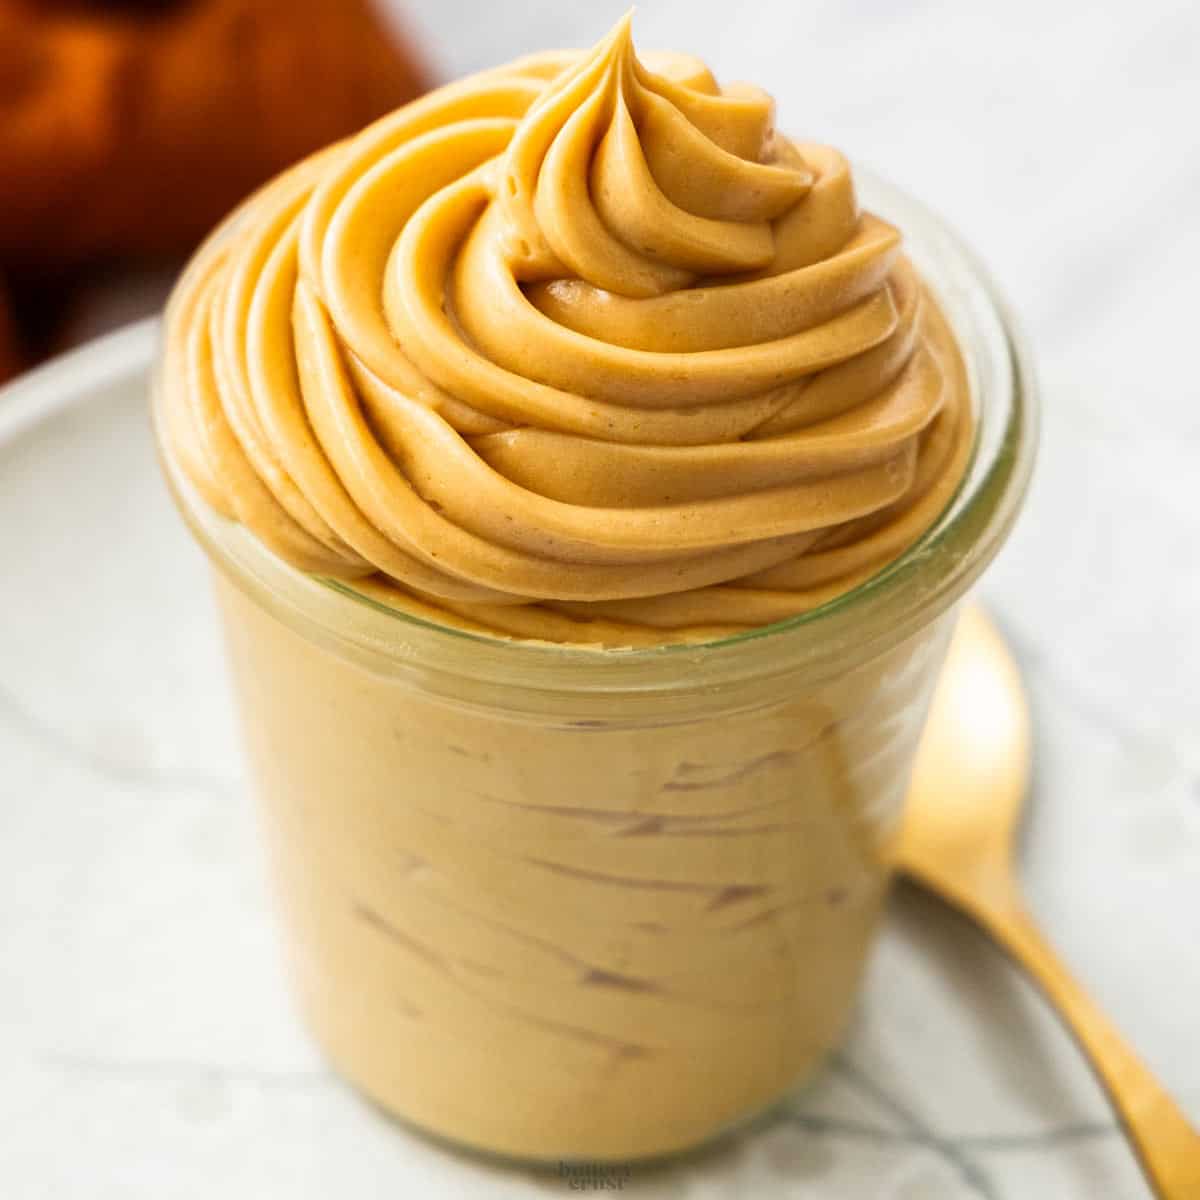
If you've ever tried a hazelnut praline paste in a French pastry or tucked inside a layer cake, you know how magical this stuff is. With complex deep, sweet caramel and toasty nutty flavours, it borders on addictive in the best way.
With just 3 ingredients and a food processor, you can create this scrumptious French nut paste easily at home. My version of this glossy sweet paste has a little twist that makes all the difference and gives the most amazing nutty flavour.
I use it in this wonderful Raspberry Profiterole Wreath.
Jump to:
- ❤️ Why you'll love it
- What is praline paste (Pâte Pralinée)?
- Ingredients you'll need
- Tools you'll need
- How to make praline paste
- Tips and tricks
- How to use praline paste
- Variations
- Adjusting the flavour profile
- Troubleshooting tips
- Storage and Shelf Life
- More recipes you'll love
- Hazelnut Praline Paste
- 💬 Comments
❤️ Why you'll love it
- Just 3 ingredients you can find anywhere.
- Incredible flavour in this 100% hazelnut praline paste.
- Versatile: Use in cakes, pastries, brownies, ice cream or spread on toast.
- Make ahead and freezer friendly: Keeps for 3 months in the fridge and freezes beautifully.
- One simple secret makes it the best praline paste you'll try.
- Step by step photos so you know what to look for.
- Adaptable: You can swap some or all of the hazelnuts for almonds or other nuts.
Just want to get started? Head to the bottom for the recipe or hit the "jump to recipe" button at the top, or read on for more about the techniques and key steps to success!
Never Miss a Recipe!
Get the latest recipes straight to your inbox!
What is praline paste (Pâte Pralinée)?
Praline paste is a French spread (pâte pralinée) made from caramelised sugar and toasted nuts, most often hazelnuts but almonds are often used too.
This paste is often used as the basis for praline cream, used in paris brest but it's wonderfully versatile in it's uses from stirred through ice cream to spread on toast, drizzled over waffles, inside cupcakes and cakes, swirled through brownies and blondies.
Ingredients you'll need
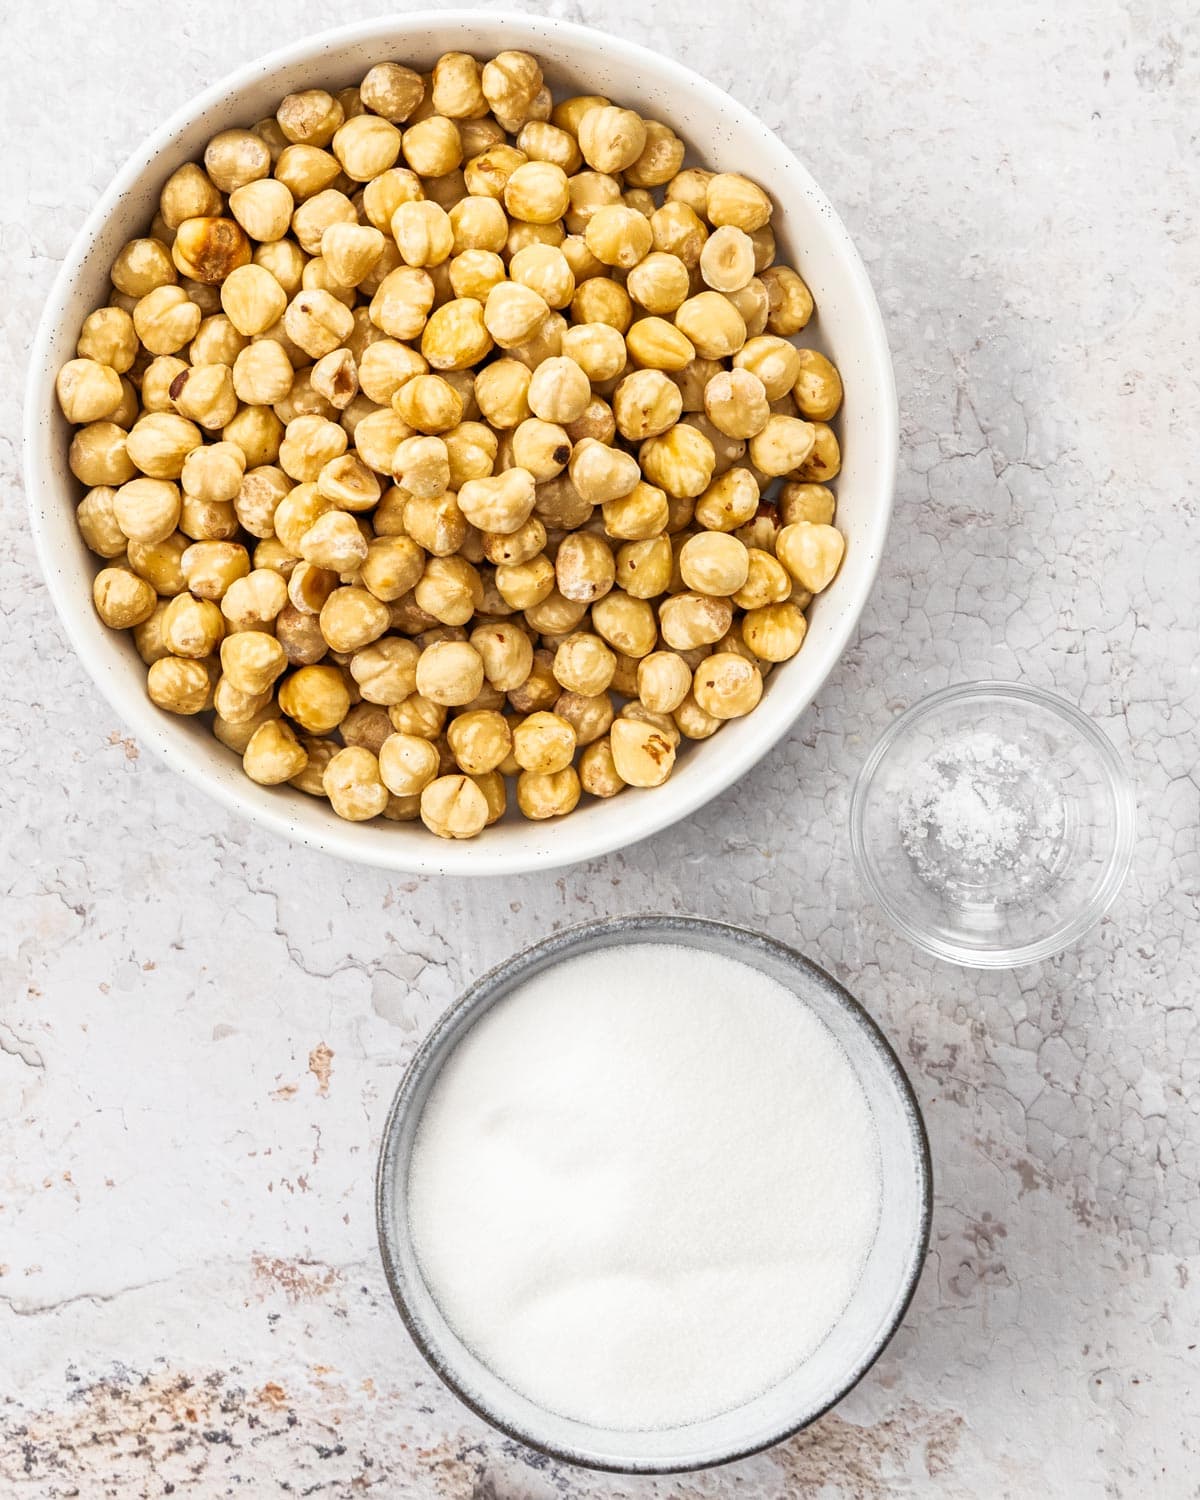
- Nuts: For this recipe, I use hazelnuts but other nuts do work as well. Almond praline paste is quite classic too and pistachios work a treat. Whatever nuts you try, make sure they're skinless. You can see further down the post how to remove the skin from nuts. The nuts are toasted first to deepen their nutty flavour.
- Sugar: The sugar is turned into a toffee first. That caramelisation adds such wonderful flavour. I use caster sugar as it melts more quickly but granulated white sugar will work too. Don't use brown sugar.
- Salt: Just a little pinch of salt intensifies the flavour without it tasting salty.
Tools you'll need
- Baking sheet (topped with baking or parchment paper)
- Stainless steel heavy-based pan
- Silicone spatula
- Food processor - high powered is best but a smaller one will work, used more gradually
- Jar/s for storage
How to make praline paste
The most traditional way to make hazelnut praline paste is to make a wet caramel (ie, water and sugar together) and once boiling, add the nuts and stir constantly until the sugar has dissolved and turned amber. This is then set and processed to a paste.
My method is easier but yields the exact same results. We start with a dry caramel which can look weird at first but is less prone to issues than a wet caramel. It gets poured over the nuts and allowed to set before being processed. You can also just set the toffee on it's own and add it to the nuts in the food processor.
The caramel/toffee stage can seem intimidating but if you look for the clear cues, it's actually very straightforward. Just make sure you're always paying attention.
⬇️ Jump to the recipe card for full quantities and instructions.
Toast the nuts
The hazelnuts are always toasted before making praline paste. It deepens their flavour and intensifies nuttiness and even butteriness in the paste. But here is my little secret to make it even better. Whilst you could just toast the hazelnut whole, I cut mine in half first for extra toasted surface area.
Once they're cut in half, place the nuts on a baking sheet.
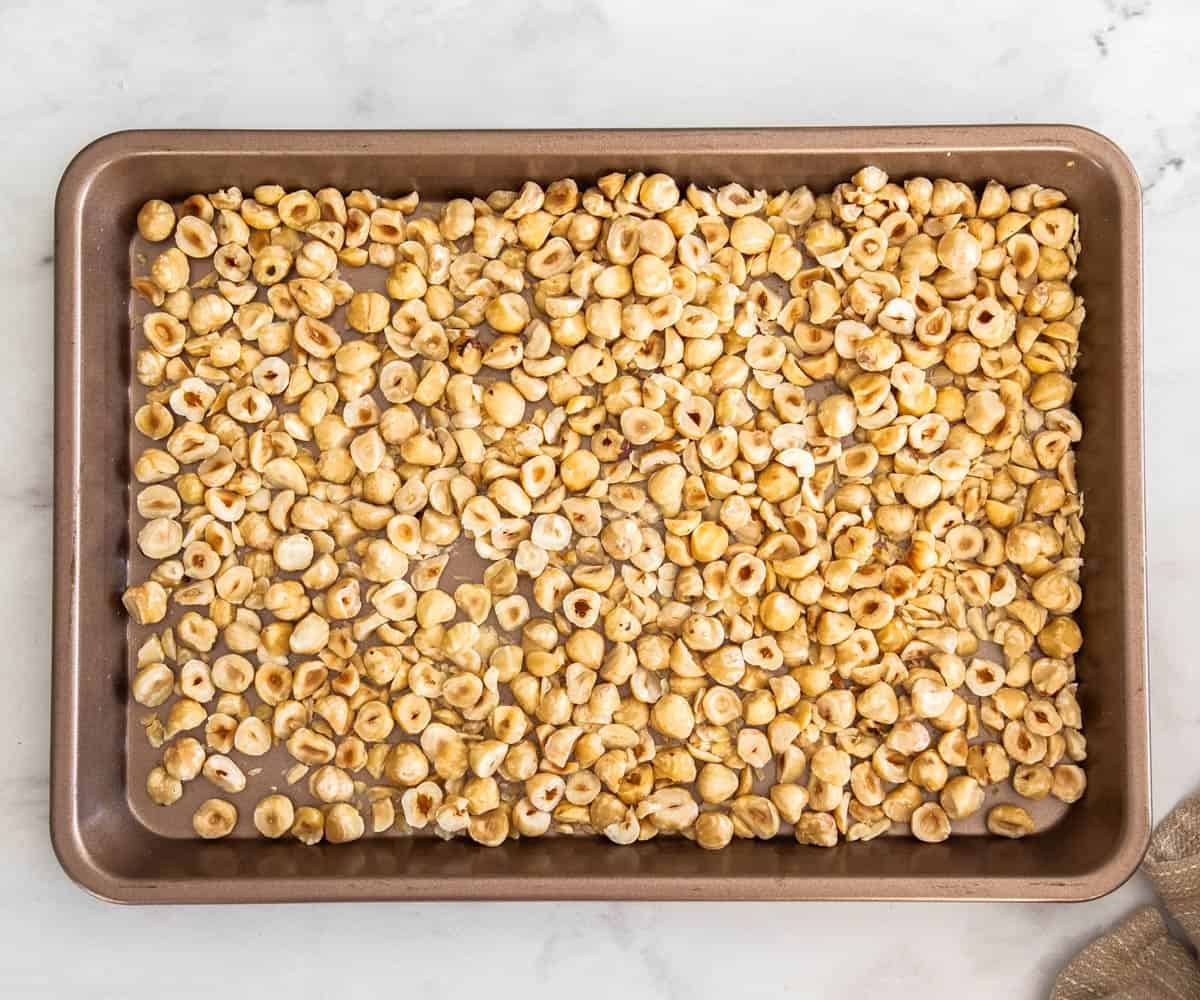
Toast in an oven, preheated to 180C/350F, for 10-15 minutes. The time will depend on the size of your nuts. You're looking for a lovely golden colour and a strong nutty aroma.
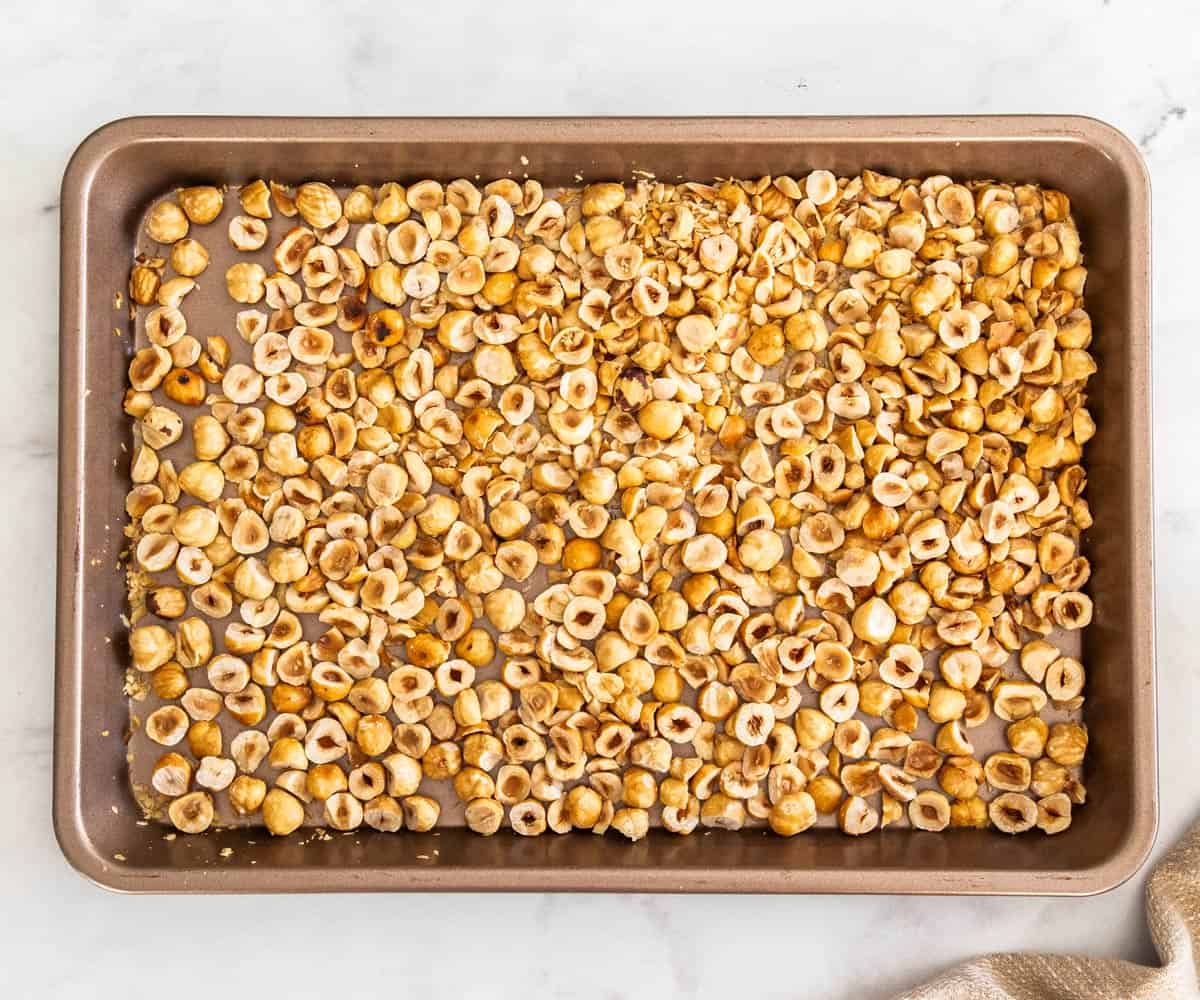
Why halving the nuts works!
Halving the nuts quite simply gives more surface area to toast but also the right balance of toasted to less toasted portion of the nuts. If you chop them too small, too much surface area is toasted compared to creamy (adding more bitterness). After testing, I found halving them to be the perfect balance.
Make the toffee/caramel
This is a dry caramel cooked to hard crack stage (toffee stage) so that it sets hard and gets a deep golden brown colour. Don't take it too far or you risk the toffee having a bitter flavour.
Start by rubbing some vinegar around the inside of an 8-9 inch heavy base stainless steel pan, then rinse it out. This ensures there is no chance of any grease particles affecting the way the sugar melts.
Add your sugar to the pan in an even layer and place it on the stove over low-medium heat. As it warms stir it with a rubber spatula. The sugar will begin to melt, then start clumping together - that's perfectly fine. It might look at this point like it's all going wrong but it's not. Just keep using your spatula to stir and turn the sugar and press it down to break up larger clumps if you can.
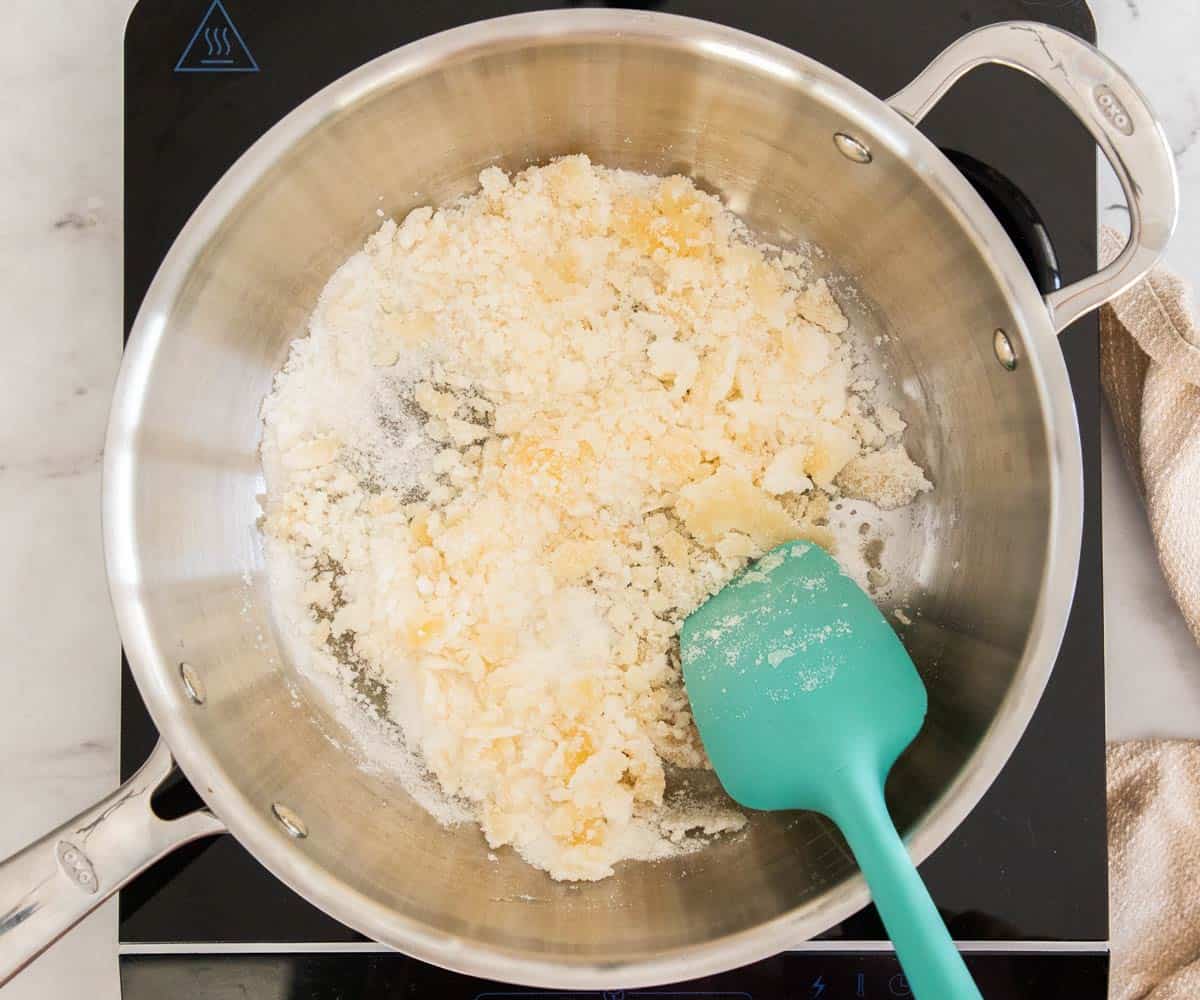
Eventually, it will melt more and more and those bigger chunks of sugar will break down too.
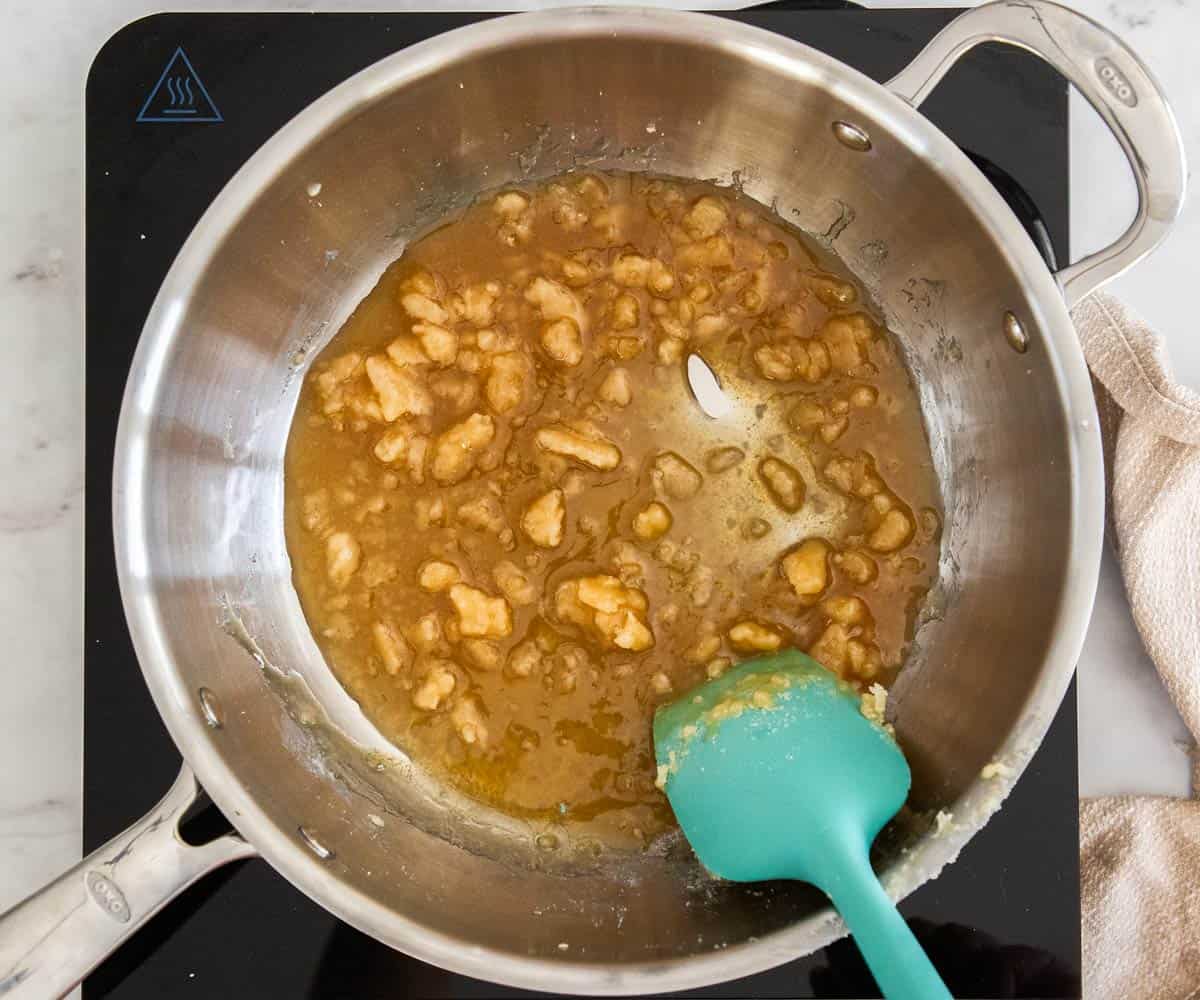
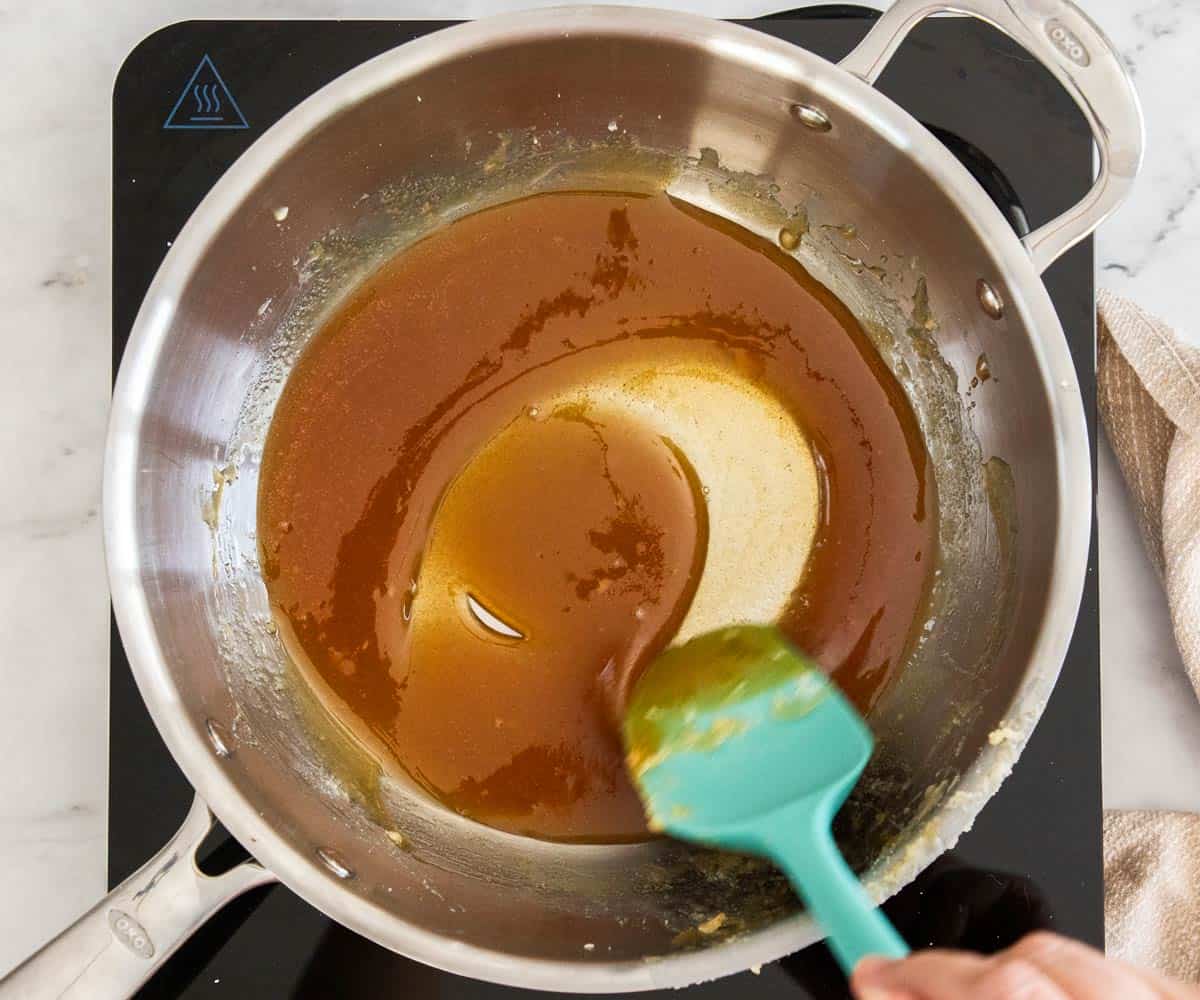
Once all the sugar has broken down, continue cooking it until you get a nice amber brown colour. There is no need to use a candy thermometer for this - let the colour guide you. The darker you let the caramel become, the more bitter it will be in flavour. A little bitterness is good but too much can be overpowering so do what works for you. If you want it sweeter, take it off the heat while it's a paler colour.
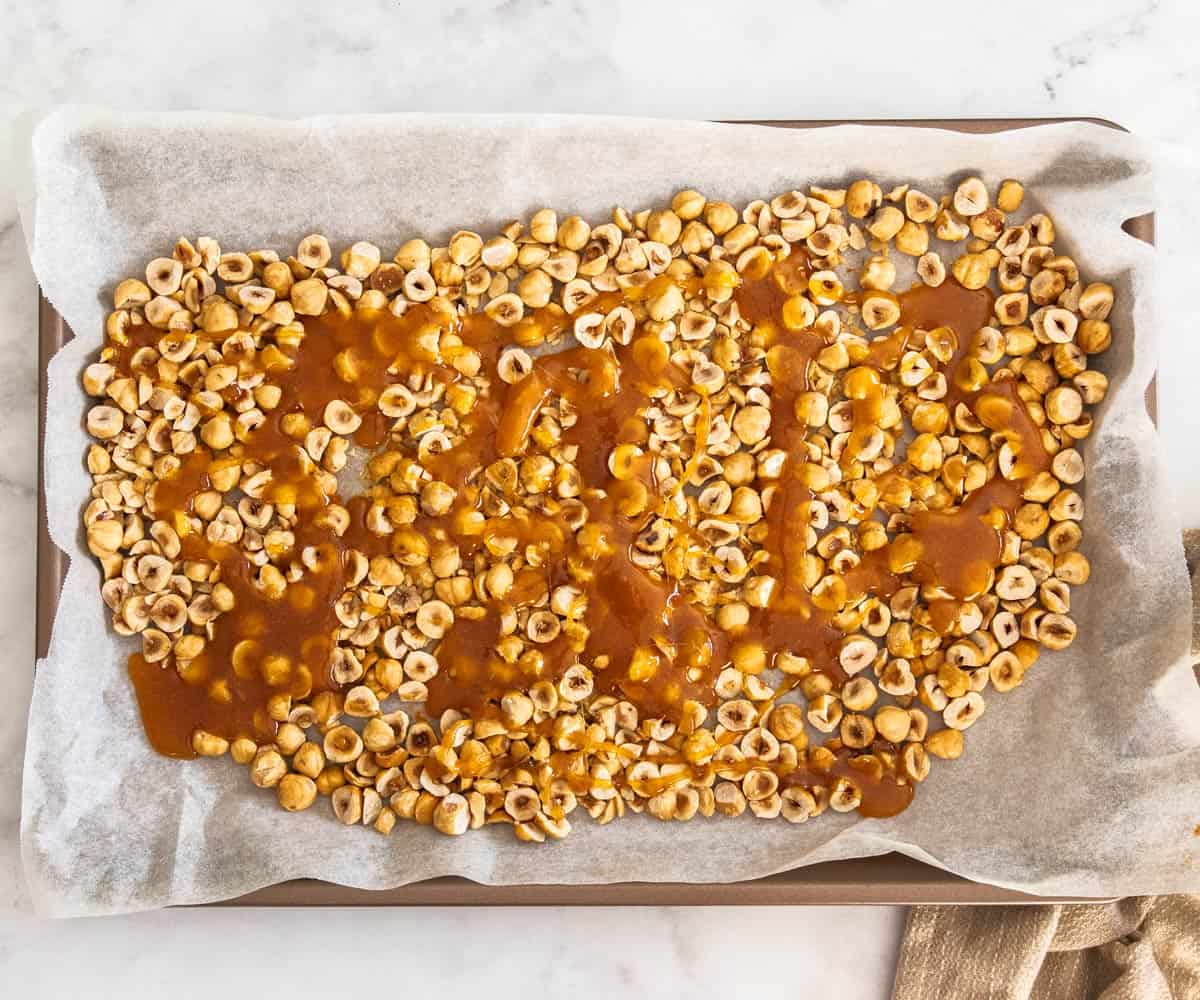
Pour the hot toffee over the nuts. Drizzle it around a bit. The thinner it sets, the easier it is to break up later. Let it set until hard (this will only take a few minutes but wait until it's cool enough to handle).
Dry vs wet caramel
I find a dry caramel is much less prone to crystallizing than a wet caramel however a wet caramel can work better if its humid where you are.
A dry caramel is nothing but sugar in a pan over heat. It will slowly melt, forming chunks to begin with then gradually morphing into caramel. It's quicker to make that a wet caramel and I find it less prone to crystallization.
A wet caramel is sugar with a little water added to a pan and dissolved over heat. This version won't form chunks and can work better in humid weather but it is also more prone to crystallization.
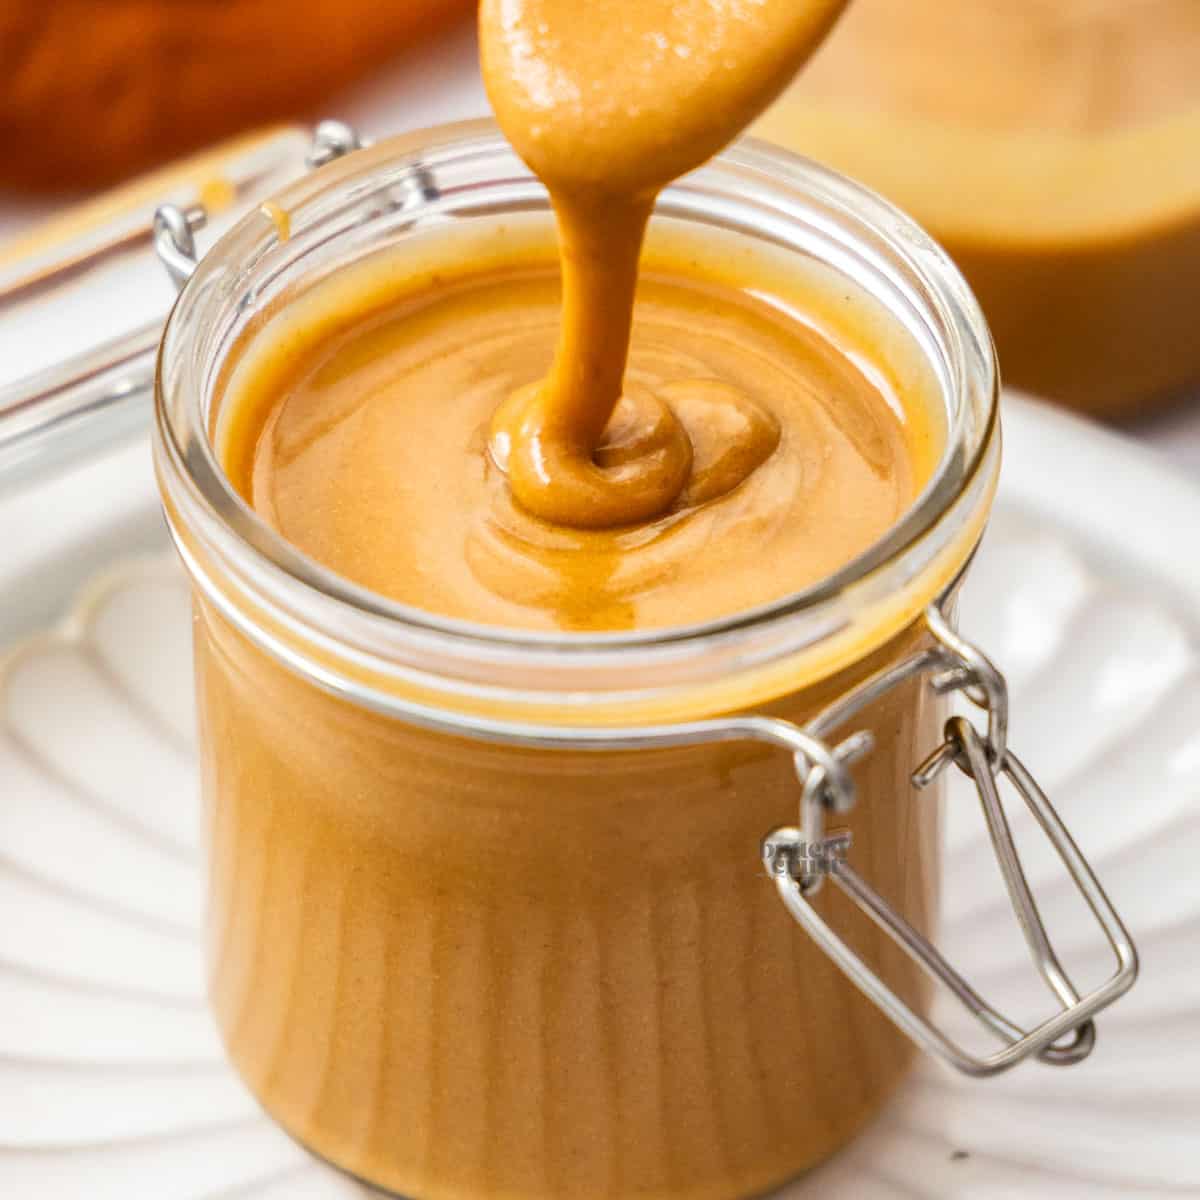
Turn it into praline paste
Once the toffee is hard and cool enough to handle, break it up into smaller pieces. You can do this by hand or if it's very thick a gentle bashing with a rolling pin or pestle will help. Transfer it to a food processor.
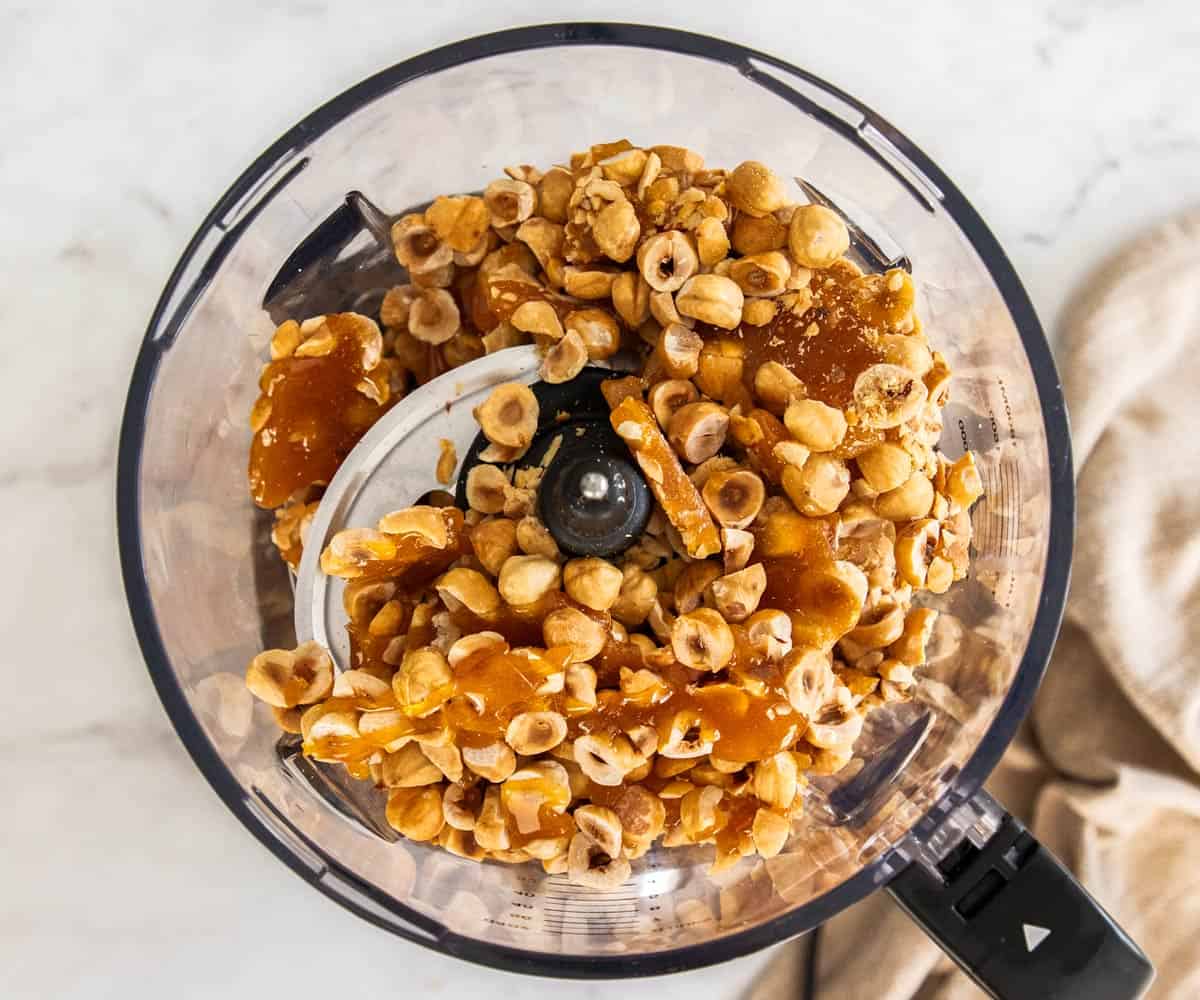
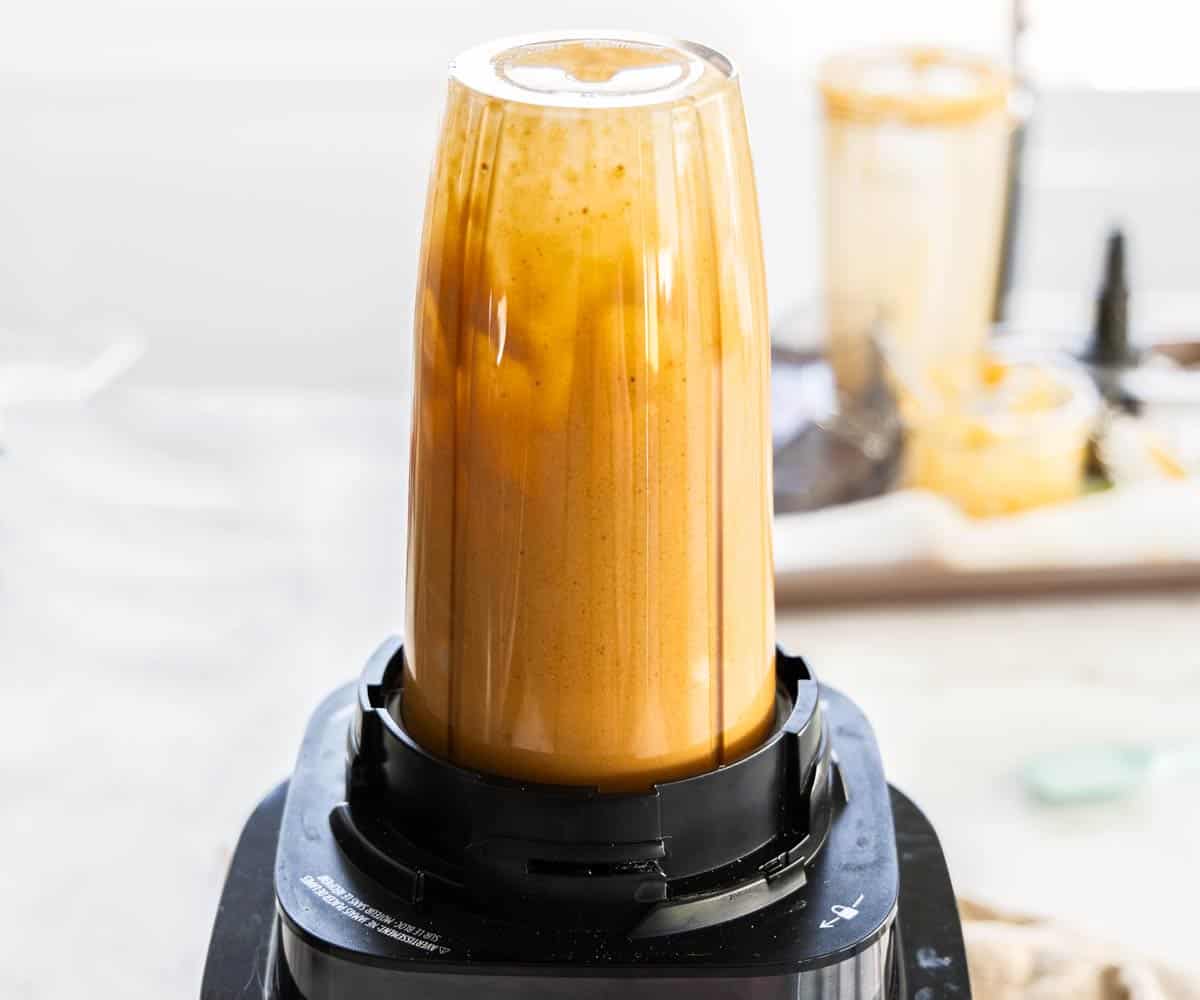
Process the mixture on the lowest speed for 5-7 minutes but stop after every minute to give the motor a break and to scrape the base of the bowl. It will gradually turn from a sandy texture to a paste. Make sure to scrape down the bowl regularly so it all blends evenly.
Save this post!
No spam, I promise 😊
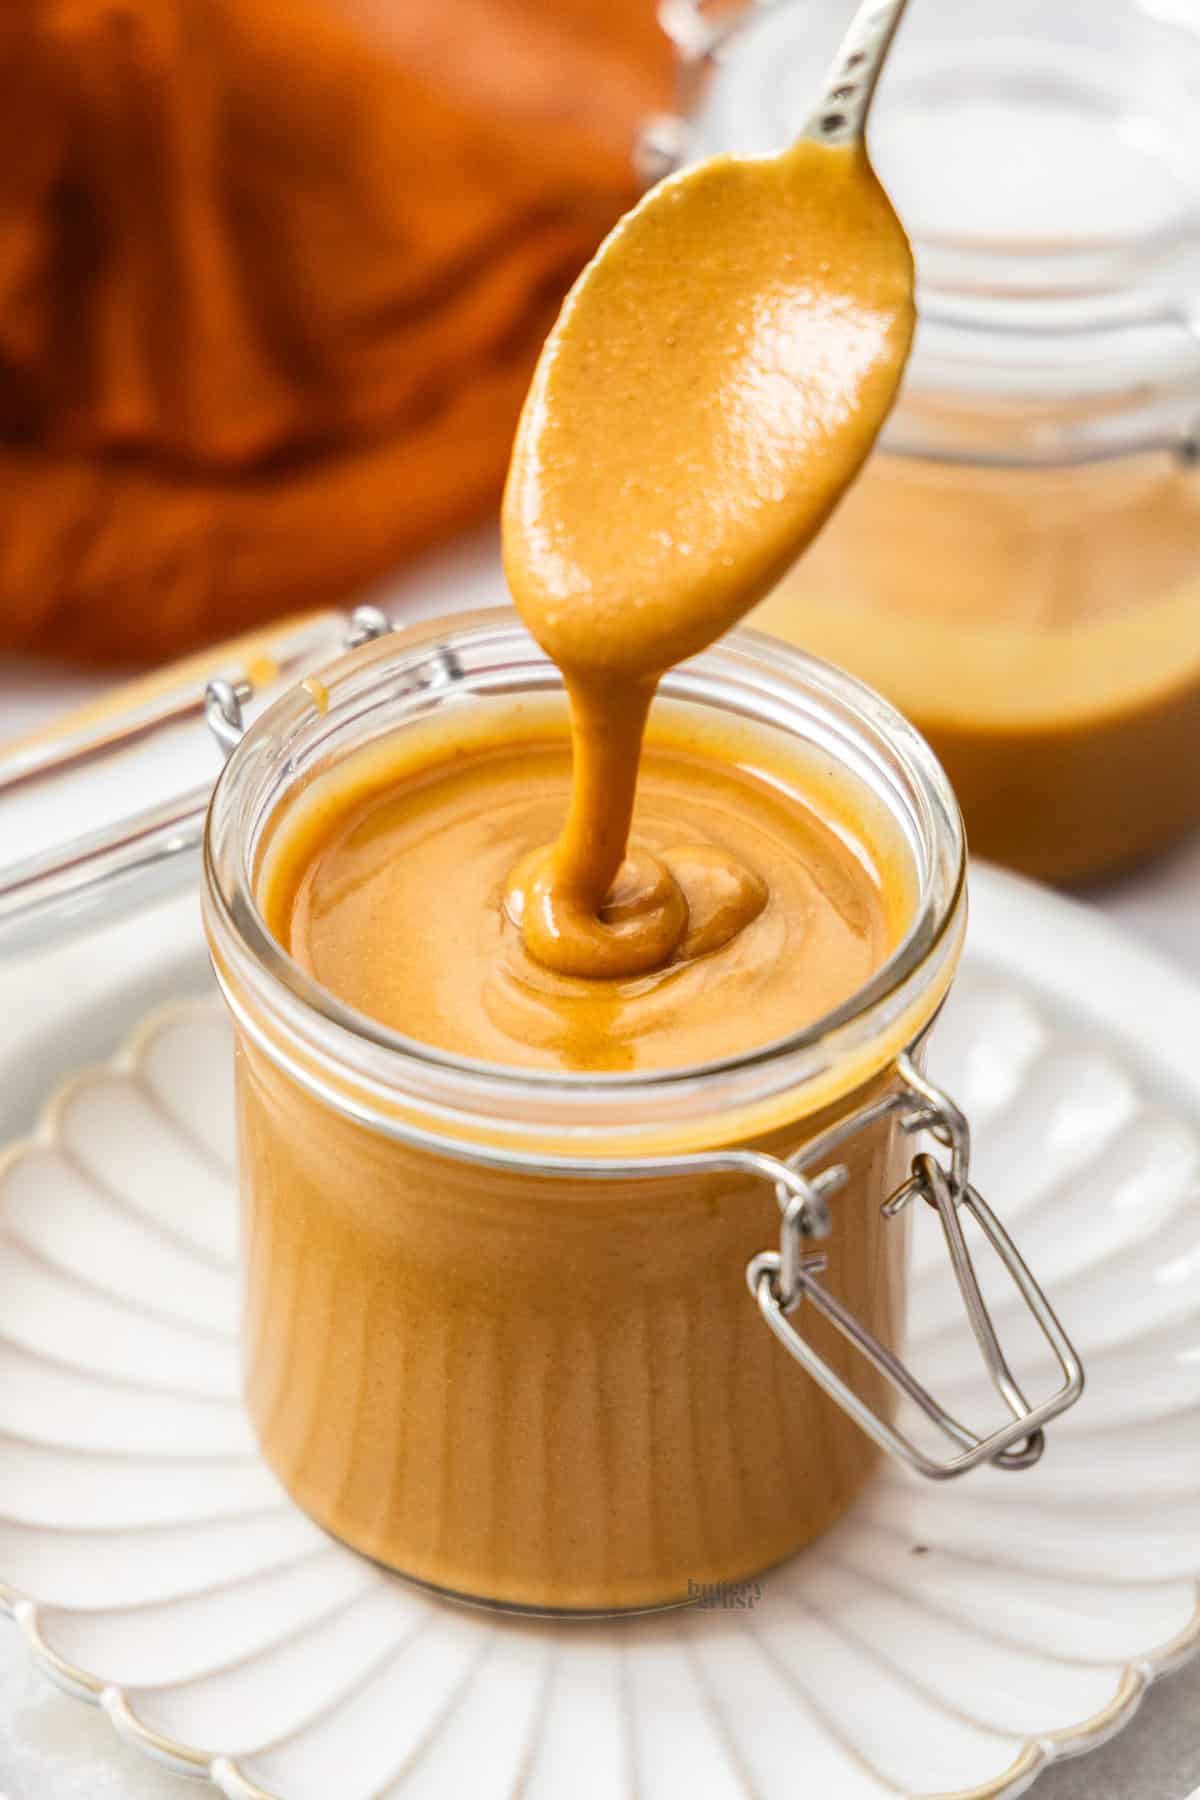
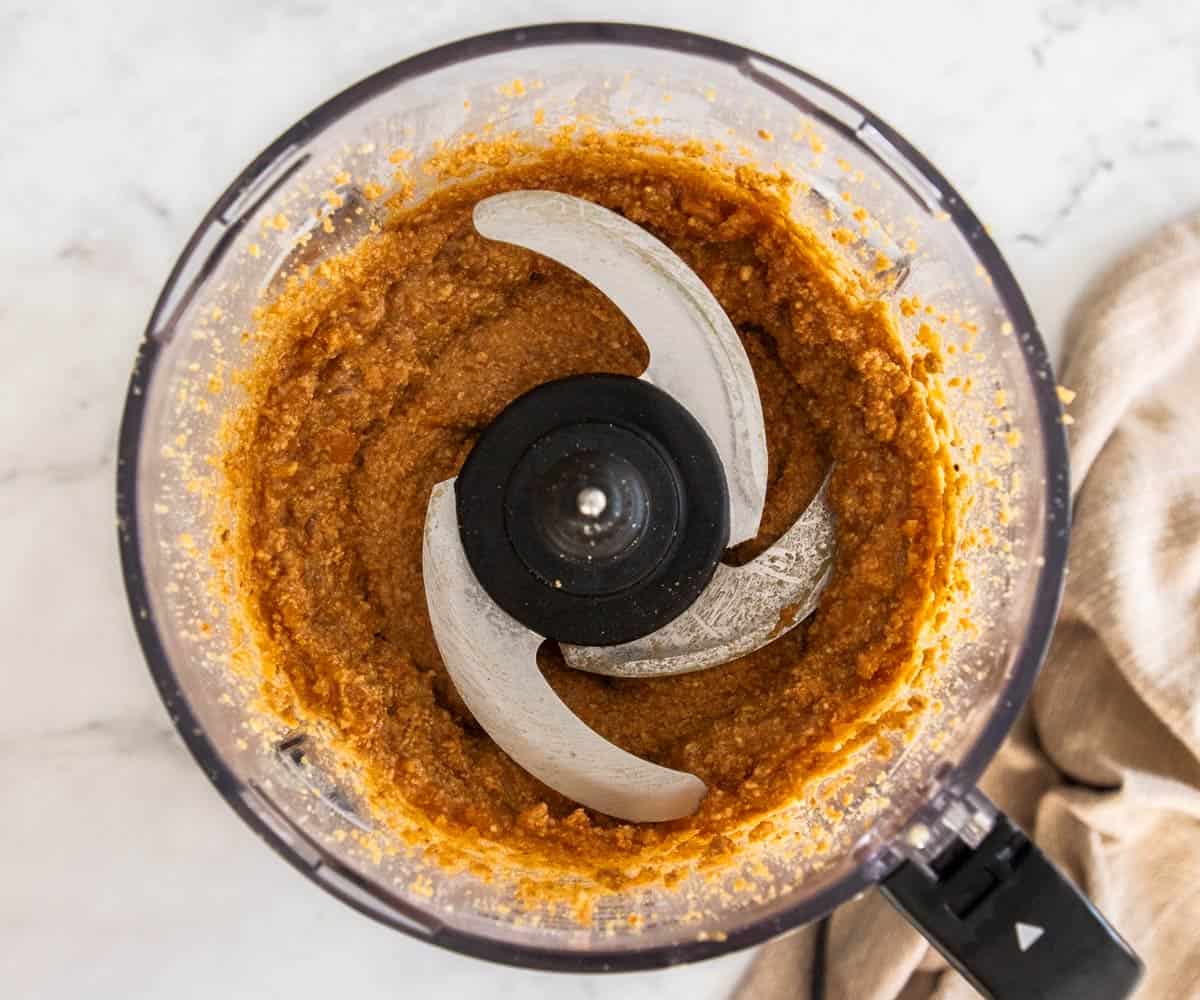
At this point, you will have a perfectly acceptable praline paste but it will still have bits of nuts and toffee through it. You can continue to process it to the consistency and smoothness that you like. It could take a total of 10-15 minutes depending on how runny you like it.
How long it takes to turn into a paste will depend on the power and size of your processor. A smaller processor or one with a small motor may have trouble blending this all in one shot so give it a break as needed if you feel the machine heating up.
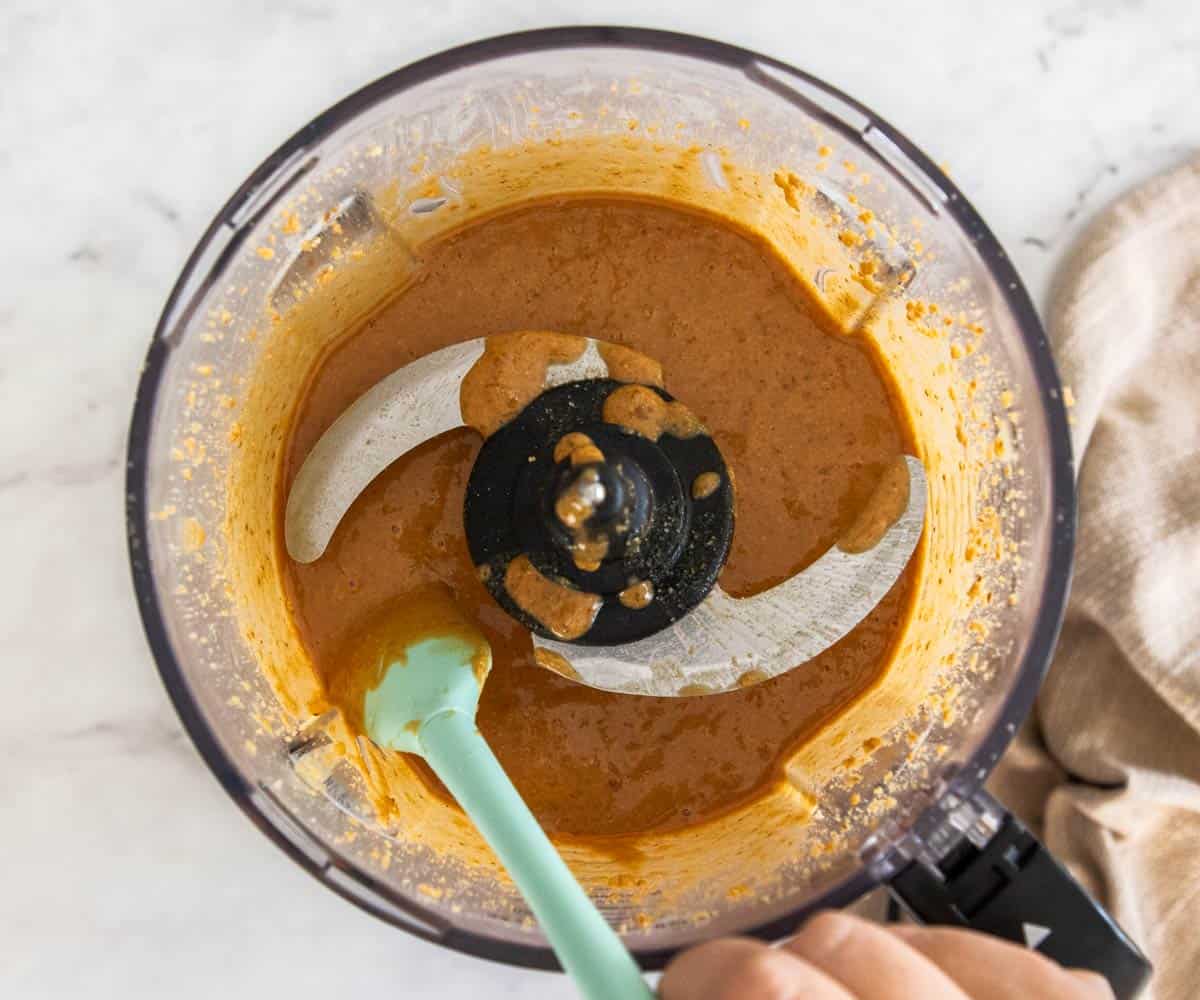
If your processor is having difficulty turning the mixture into a paste despite trying to blend it for a while, you can give it a helping hand by just adding a teaspoon or two of sunflower oil. I find the Ninja smoothie blender is great once you've already got it to a paste consistency in the food processor and I don't require any added oil in my Ninja.
Tips and tricks
- Halving the hazelnuts before toasting gives more surface area to get toasted - aka, more flavour!
- Remove the skins from the nuts before toasting. The skins give a very bitter flavour.
- Make sure your pan and spatula are impeccably clean as even the slightest amount of fat that may be stuck on them can cause your caramel to crystallize. Rub a little vinegar over them and rinse before use.
- Keep moving the sugar around the pan to help it dissolve before it turns too dark.
- If the sugar is colouring more quickly than it's melting, turn the heat down slightly.
- If the processor is stuck or having trouble turning your nuts and toffee into a paste, add 1-2 teaspoons of sunflower oil to help it along. Make sure also to scrape the bowl down fairly regularly.
- If you have a processor with a smaller motor or feel it getting hot, give it a break. You can even break up the processing over a few days if you want to be extra careful with a smaller processor.
- Don't use brown sugar. It adds water content to the caramel that you can't control and can lead to crystallisation. It also makes it impossible to tell when the colour of the caramel is right.
- If your caramel crystallizes, as long as you catch it early, add a tablespoon of boiling water and keep on stirring until the crystals have dissolved.
How to use praline paste
Aside from eating off a spoon straight from the jar (just try and stop me), the uses for this hazelnut praline paste are nigh on endless.
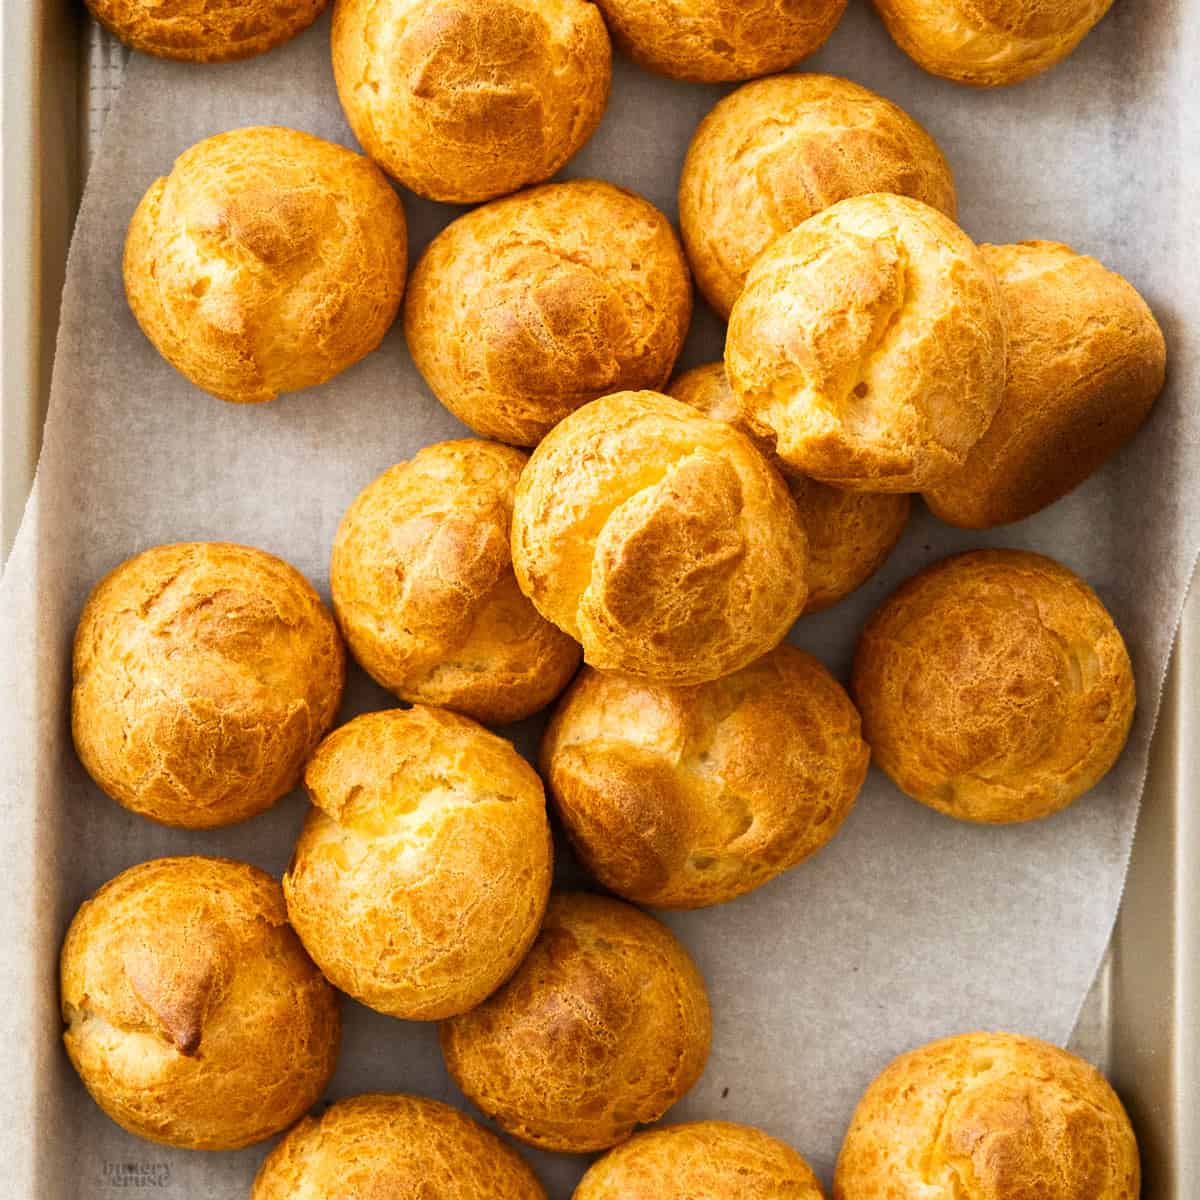
- Paris brest is the traditional use for praline paste
- Other pastries like profiteroles and chouxnuts
- Stirred through ice cream
- Spread on toast or drizzled over waffles for breakfast
- Use it to sweeten your porridge
- Swirl through brownies or blondies before baking
- Swirl it through cheesecake
- Stuff cookies with it
- Use inside layer cakes
- Use it as a surprise centre in cupcakes or macarons
- Freeze then coat in chocolate and gift them
- Gifting! This hazelnut praline paste is a wonderful gift and the recipe is easy to scale. Just make sure to be kind with your processor or blender and don't overload it all at once.
Variations
While traditional to make praline paste with hazelnuts, you can use other nuts as well. Almonds are very common. Use blanched almonds and chop them into chunks before toasting. Pistachios are also wonderful. Try macadamias or cashews too for a creamy delicious version.
You can use one variety of nut or use a mixture of your favourites!
If your nuts have skins on them, it's best to remove it first. Blanch them in boiling water for 1 minute, then rub them vigorously in a clean tea towel to remove the skins. Now you can toast them.
Adjusting the flavour profile
The amount you toast the nuts and brown the caramel will dictate the flavour and colour of your praline paste. You want the nuts to get a nice golden brown but they can burn easily so be careful. If they get as far as a chestnut brown, you'll find there will be bitter notes. The aroma is important too. If they smell good, likelihood is they'll taste good.
As for the caramel, choose what suits you and your application best.
| Light Amber Brown | Medium Amber | Deep Amber Brown | |
| Flavour | Sweeter | Balanced | Bitter-edge |
| Colour of the paste | Pale beige | Golden | Golden-brown |
Ideally, you want to get both the nuts and caramel to the right colour the first time round as reheating them could result in over-caramelising and leaving a bitter flavour. That said, if your praline paste turns out paler than you wanted, you can darken it later.
Tip the praline paste into a medium saucepan and heat over low-medium heat, stirring constantly, until it deepens in colour. It may look like it's seizing but don't worry, it's quite normal - just keep stirring.
Spread it out onto a silpat or baking paper and let it set completely. Then, break it up and process it again, just as you did the first time, until it returns to a paste again.
Troubleshooting tips
- Caramel crystallised: Can be caused by even a tiny skerrick of something foreign on your pan or spatula or by high humidity. You can try adding 1-2 tablespoons of boiling water and then stirring it again to dissolve the crystals. If that doesn't work, it's best to start over with perfectly clean equipment. That said, crystallisation is less of a problem with praline paste as it will all be blended smooth anyway.
- Caramel too dark: This can give it a very bitter or burnt, even acrid flavour. If it hasn't gone too far over, you might be able to make a lighter caramel and mix it together but you do risk still having a lingering burnt flavour and it may be best to start again.
- Paste is staying thick / grainy: This is likely due to the power of your food processor. Make sure to scrape the sides of the bowl often and add a teaspoon of sunflower oil to help it along.
- Processor overheating: Try giving your processor or blender a 5 minute break if you feel it getting very hot. Also, try blending in smaller batches or over a series of days.
Storage and Shelf Life
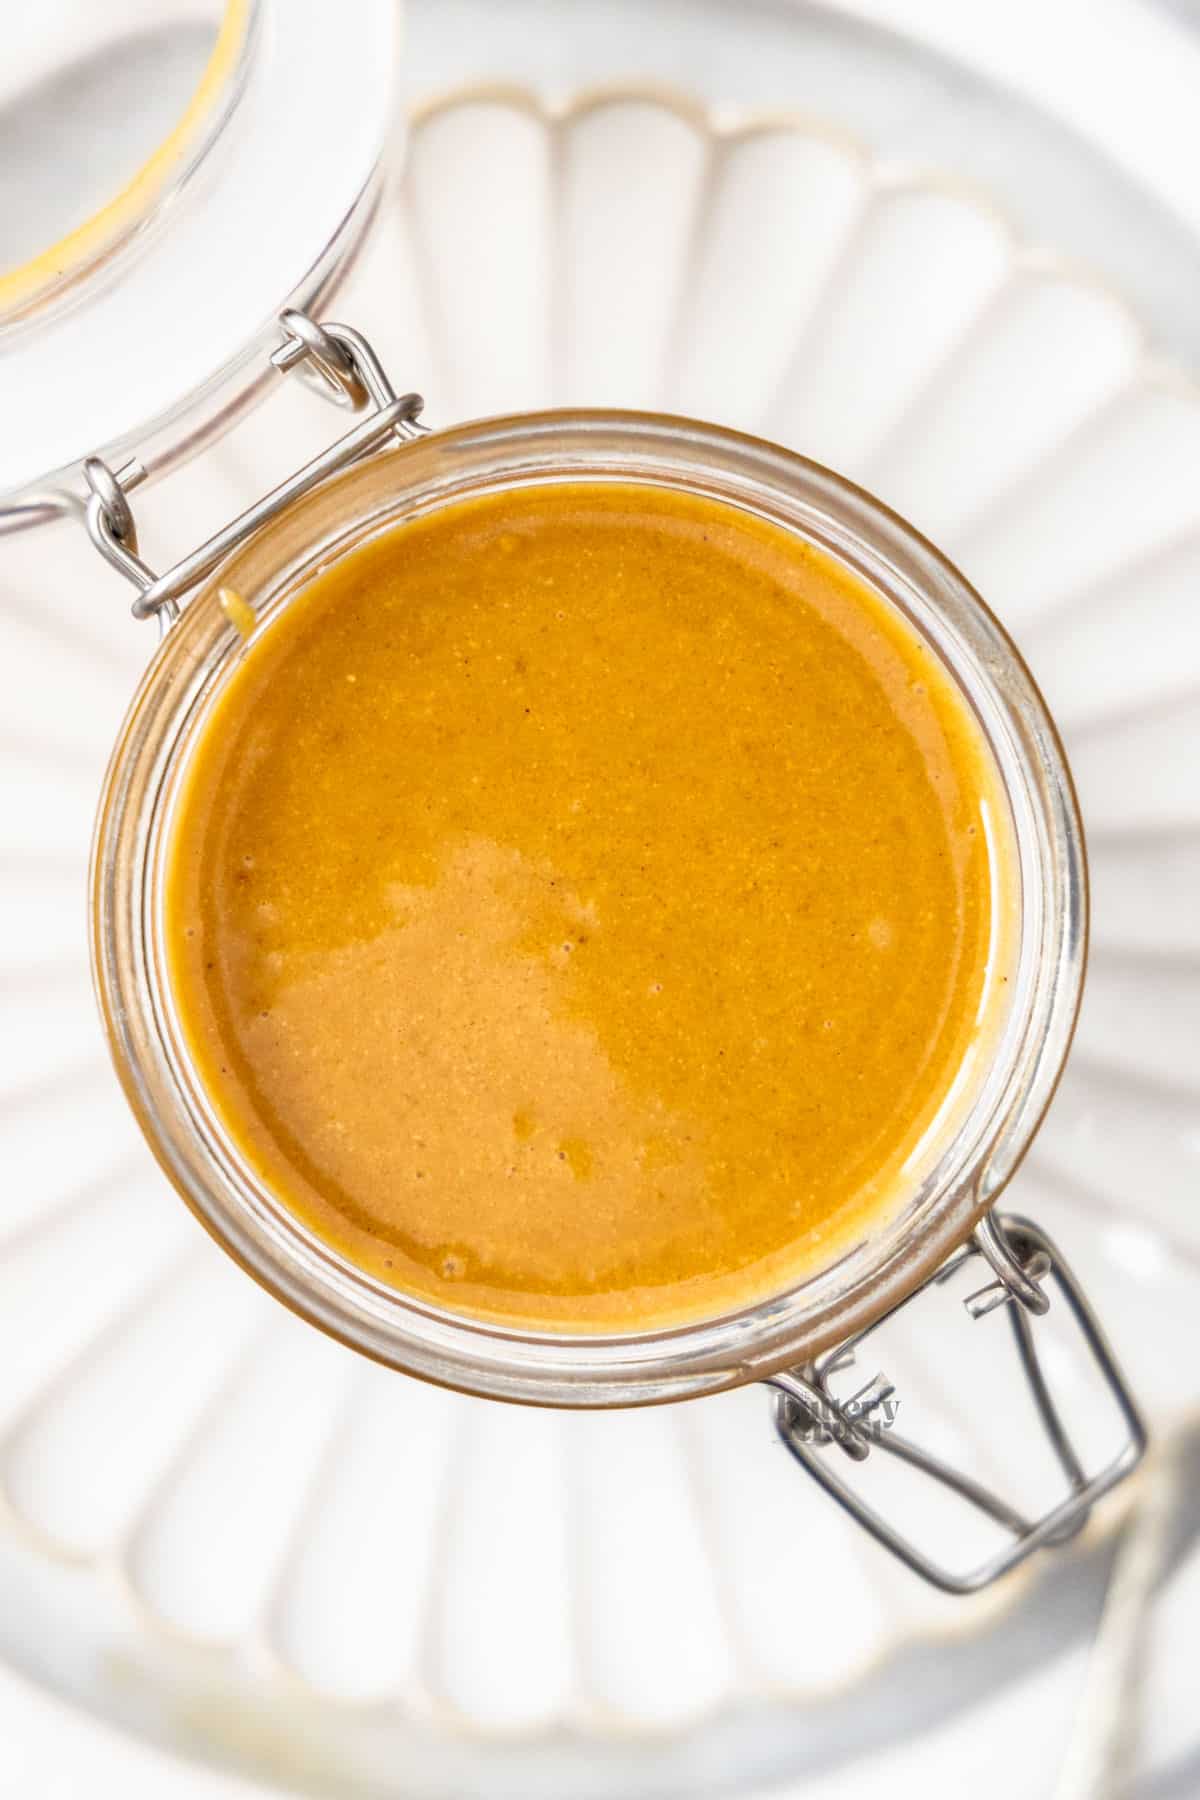
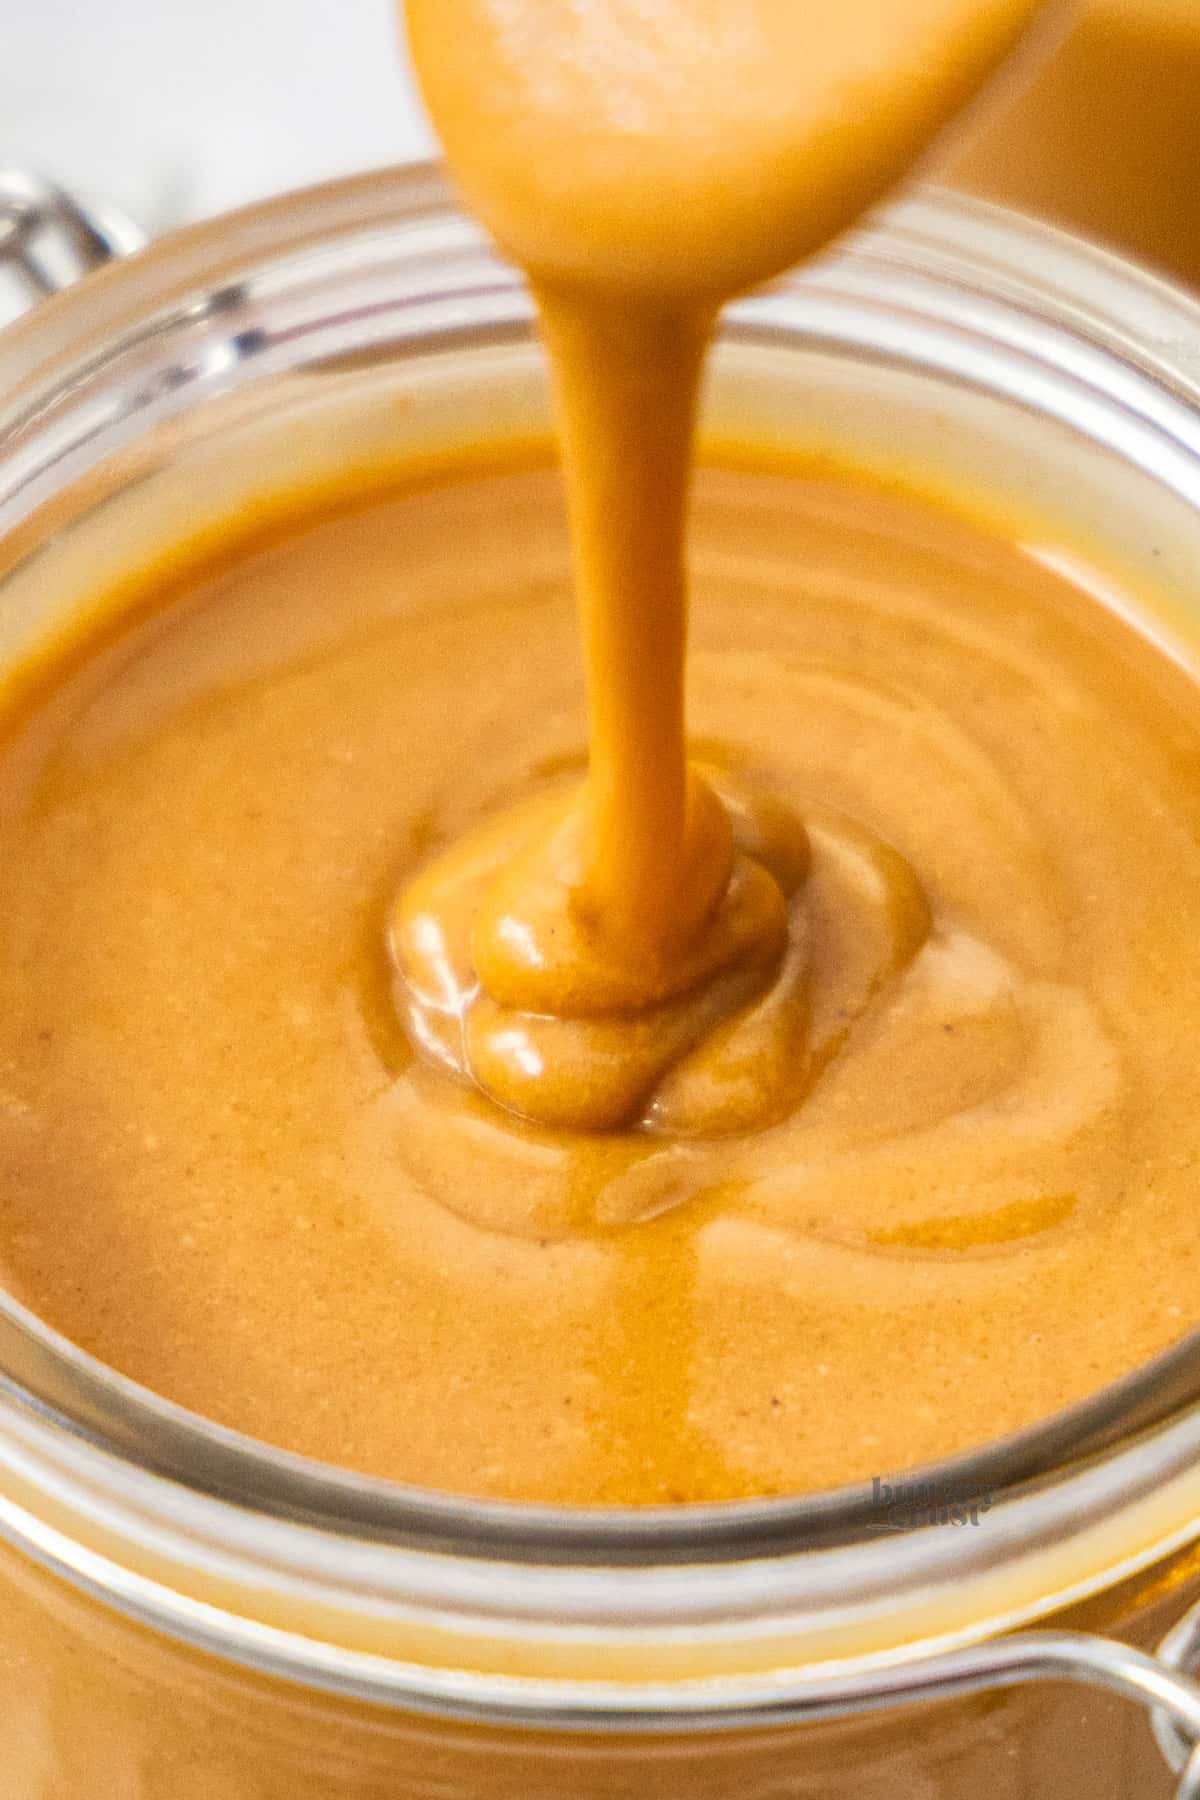
Praline paste lasts well stored in the fridge in an airtight jar (like a mason jar) for up to 3 months (or more if stored perfectly). It can last up to a year stored in the freezer. Again, make sure it's in an airtight jar or container - press some plastic wrap to the surface, further protecting it from freezer smells.
Always give it a stir before use.

If you made this hazelnut praline paste recipe,
be sure to leave a ⭐⭐⭐⭐⭐ rating below. Thank you!
Hungry for more?
- Subscribe to Email, Facebook, Pinterest and Instagram.
- Add TBC to your Google Preferred Sources.
Hazelnut Praline Paste
Equipment
- baking sheet
- Food processor high powered is best
Ingredients
- 300 g hazelnuts raw unsalted skinless (2 ½ cups / ~10 ½)
- 1 cup sugar (210g / ~7 ½oz)
- Good pinch of salt
Instructions
- Preheat the oven to 180C/350F. Line a baking sheet with baking paper.
- Chop the nuts in half (no more or you risk them burning). You can toast them whole but when cut in half, more surface area gets toasted and gives the praline a better flavour.
- Transfer the nuts to the prepared baking sheet and bake for 10-15 minutes until golden brown with a strong nutty aroma.
- Remove from the oven and let them cool for 5 minutes. Place the paper back onto the baking tray.
- Meanwhile you can get the toffee started. In a small or medium saucepan, cook the sugar over low-medium heat, stirring regularly until fully melted and amber brown.
- Pour the toffee over the nuts. Let it set and cool for 5-10 minutes or until hardened.
- Break the hazelnut toffee up into smaller pieces and add to a food processor with the salt.
- Process on low for 5-10 minutes, scraping the bottom of the bowl of the food processor with a silicone spatula after every minute until it turns into a paste that settles in on itself again when stirred.Important: Don't blow up your food processor. If you feel it getting hot, stop and give it a break to cool down. A higher powered processor will get this done quicker than a low powered processor. Take your time.
- Transfer to a clean jar and refrigerate for up to 3 months.
- Please take a moment to leave a comment & rating. It's appreciated and so helpful.
Notes
- If you can only get nuts with the skins on, you'll need to remove it first. Blanch them in a pan of boiling water for 1 minute. Strain through a sieve then transfer the nuts to a dry tea towel. Give them a vigorous rub and most of the skins should have come off. Continue until all the skins come away easily.
- You can swap some or all of the hazelnuts for almonds as well. Try other nuts too like pistachios or macadamias. Skinless nuts will be best.
- Nutrition information is per cup.


Comments
No Comments